Windows 11, the latest operating system from Microsoft, is designed to be more intuitive, productive, and streamlined than its predecessors. It boasts a modern design, with new features aimed at improving user experience. However, even with its sleek interface, navigating any operating system can still be time-consuming without the right know-how. To help users maximize their efficiency, we’ve compiled over 90 time-saving tips for Windows 11 users. These tips are practical, easy to implement, and will enhance your productivity whether you’re a casual user or a professional.
In this comprehensive guide, we’ll explore shortcuts, hidden features, customization tricks, and advanced functionalities that will help you make the most of Windows 11. Whether you’re looking to speed up daily tasks, navigate quicker through the system, or tweak the system to your liking, this article will serve as a handy reference to unlock Windows 11’s full potential. So, let’s dive into the time-saving tips that will transform your Windows experience.
1. Master Keyboard Shortcuts for Maximum Efficiency
One of the easiest and most effective ways to save time while using Windows 11 is by mastering keyboard shortcuts. Keyboard shortcuts are designed to help users navigate through the operating system quickly, without the need to dig through menus or use the mouse.
Windows + D: Instantly show the desktop, minimizing all open windows.
Windows + E: Open File Explorer quickly.
Windows + I: Launch the Settings app.
Alt + Tab: Switch between open windows and apps effortlessly.
Windows + L: Lock your PC when you need to step away.
Ctrl + Shift + Esc: Directly open the Task Manager to troubleshoot or close unresponsive programs.
Windows + V: Open the clipboard history, allowing you to paste previously copied items.
Windows + X: Access the Quick Link menu, offering shortcuts to critical settings like Device Manager and Disk Management.
Learning and using these shortcuts will eliminate repetitive mouse movements and accelerate common tasks, making it a huge time-saver over time.
2. Customize the Start Menu for Quick Access
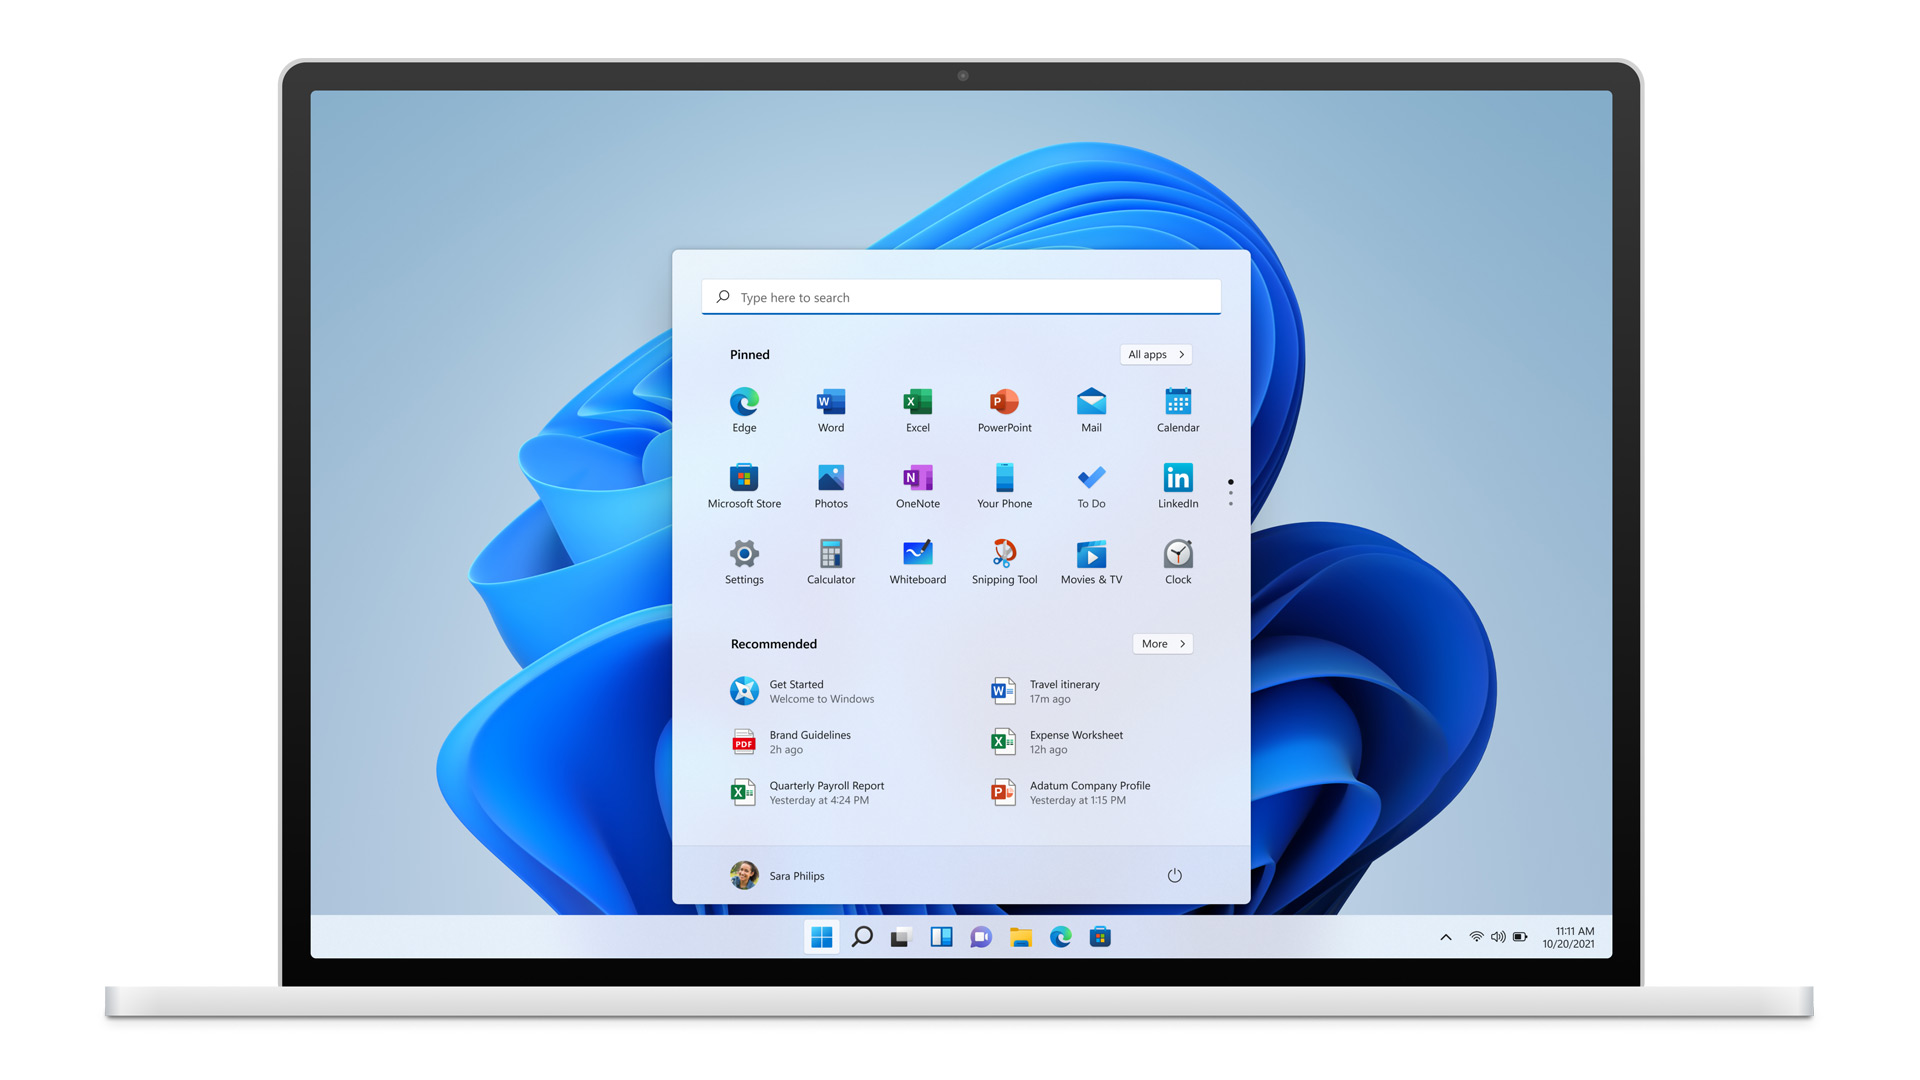
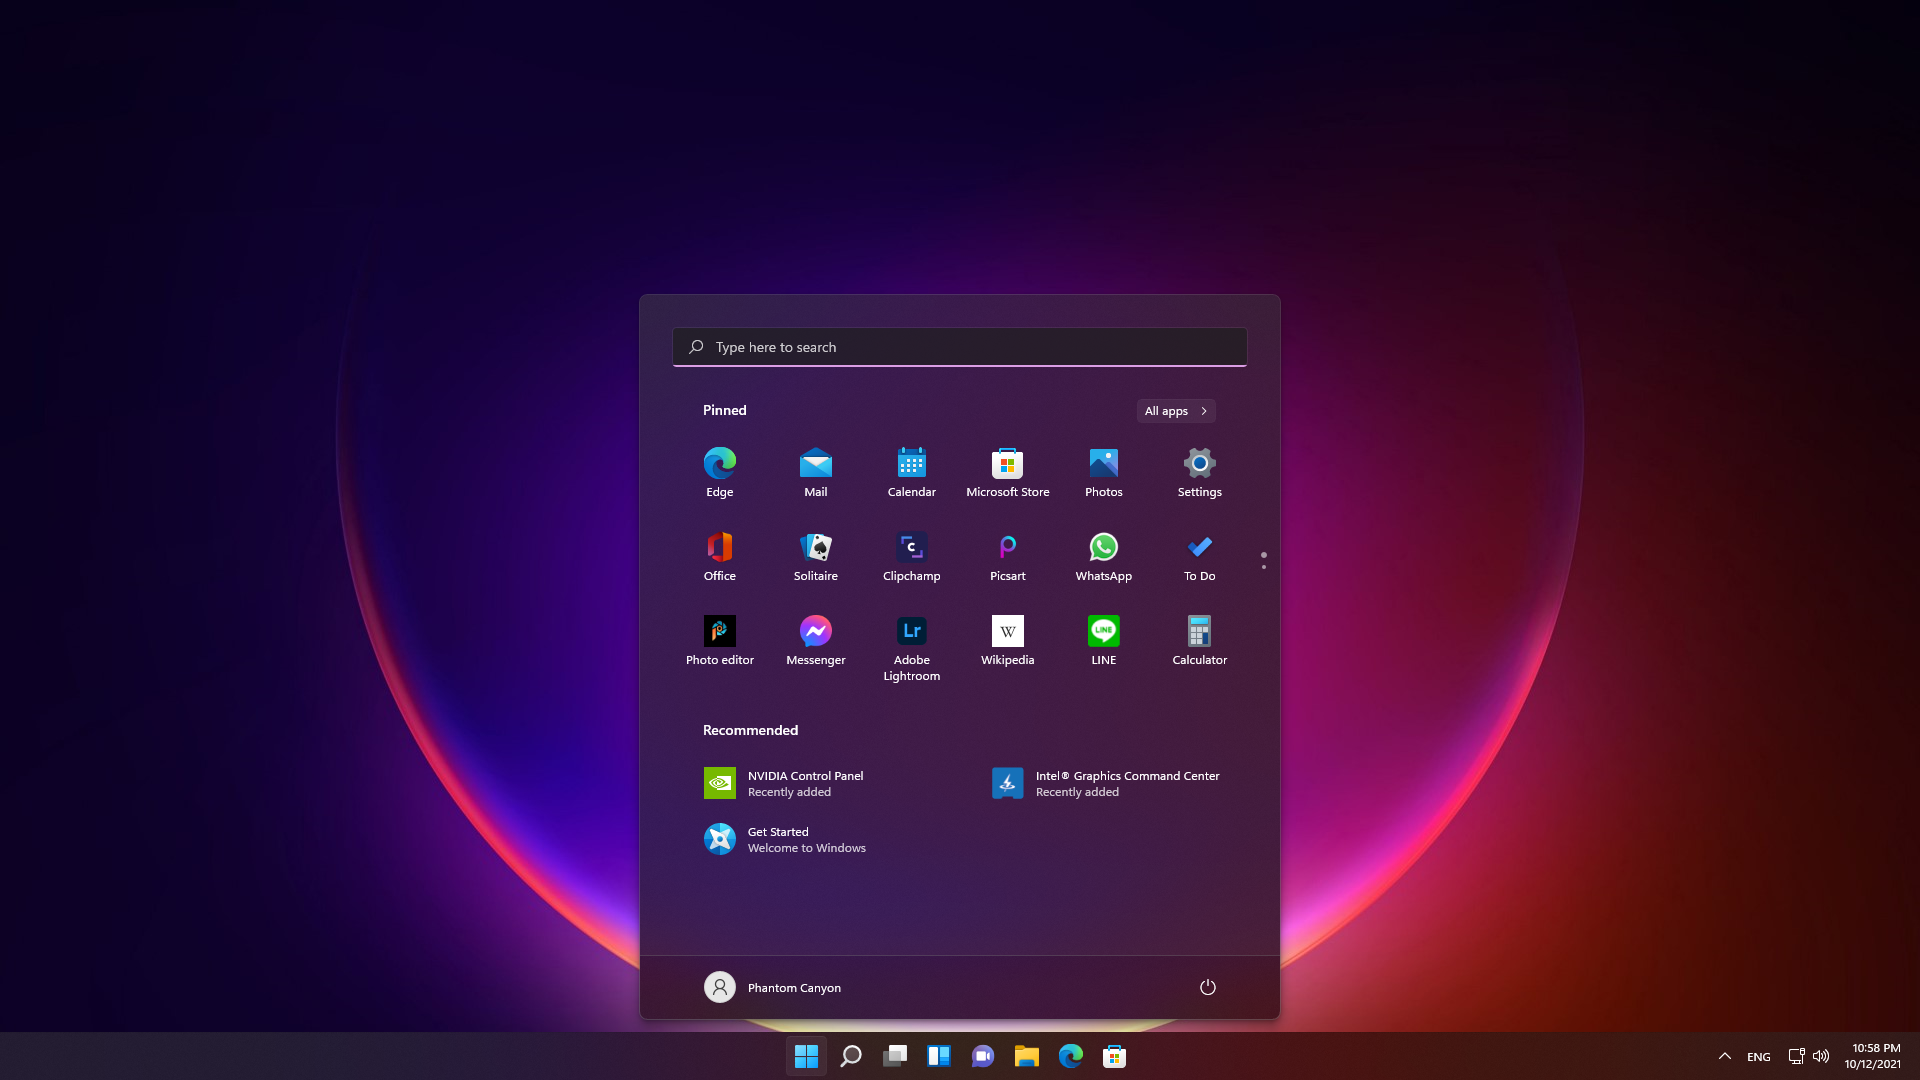
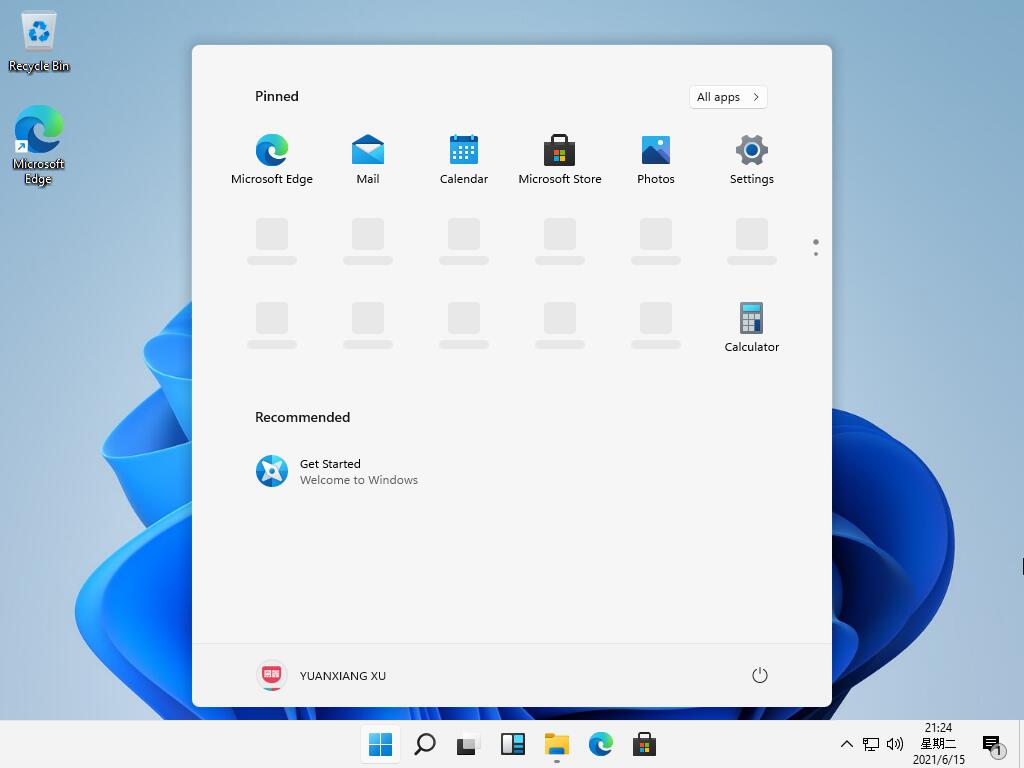
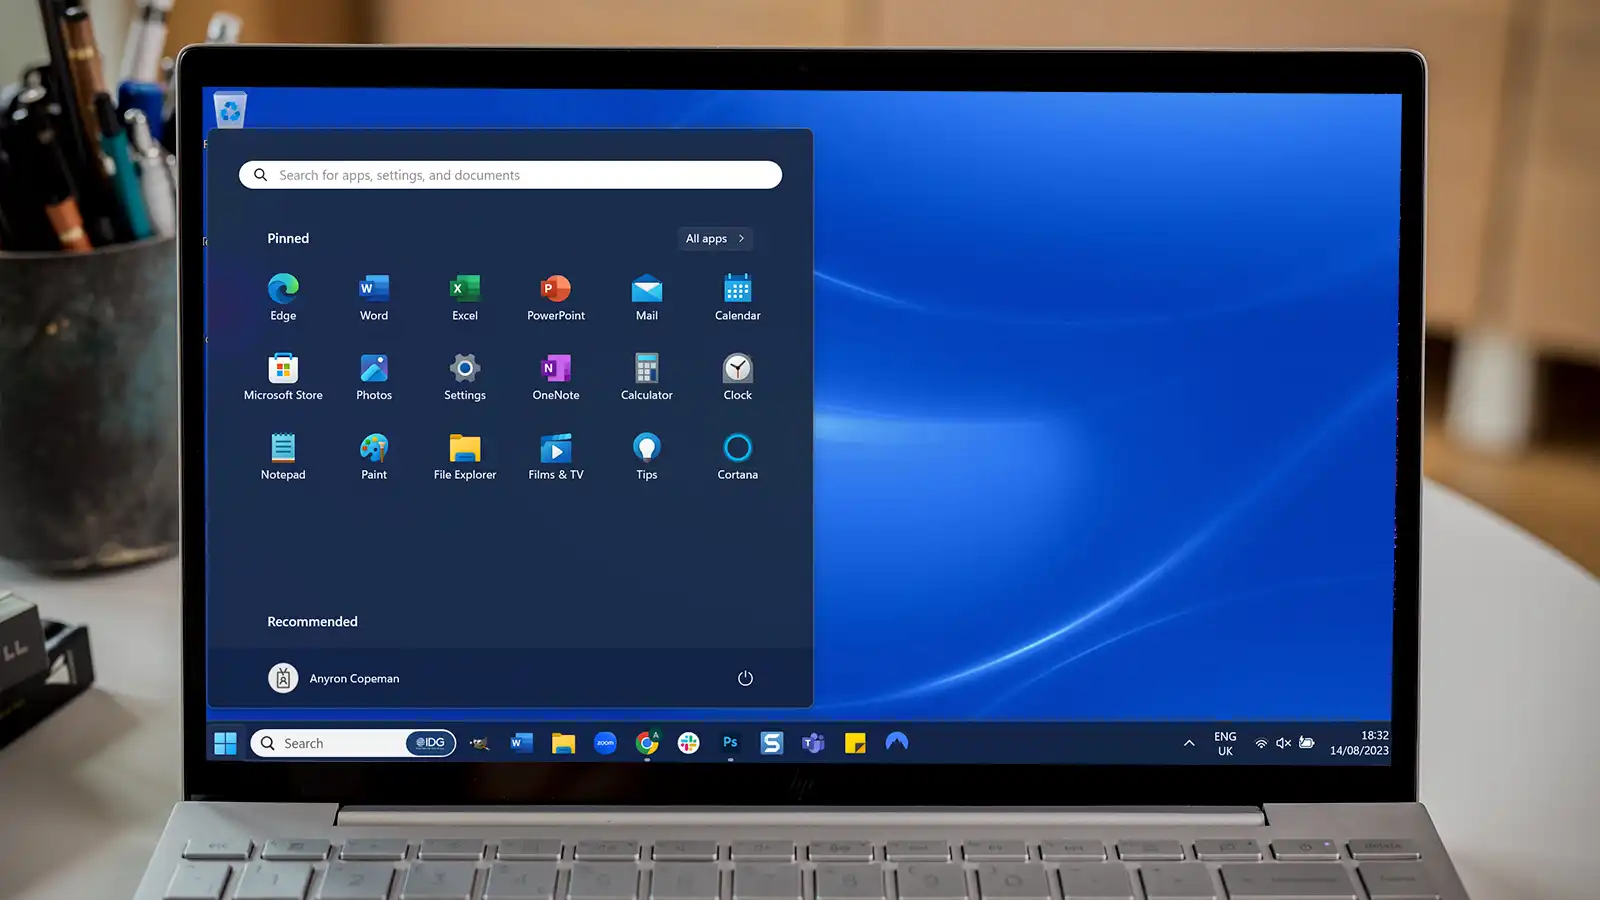
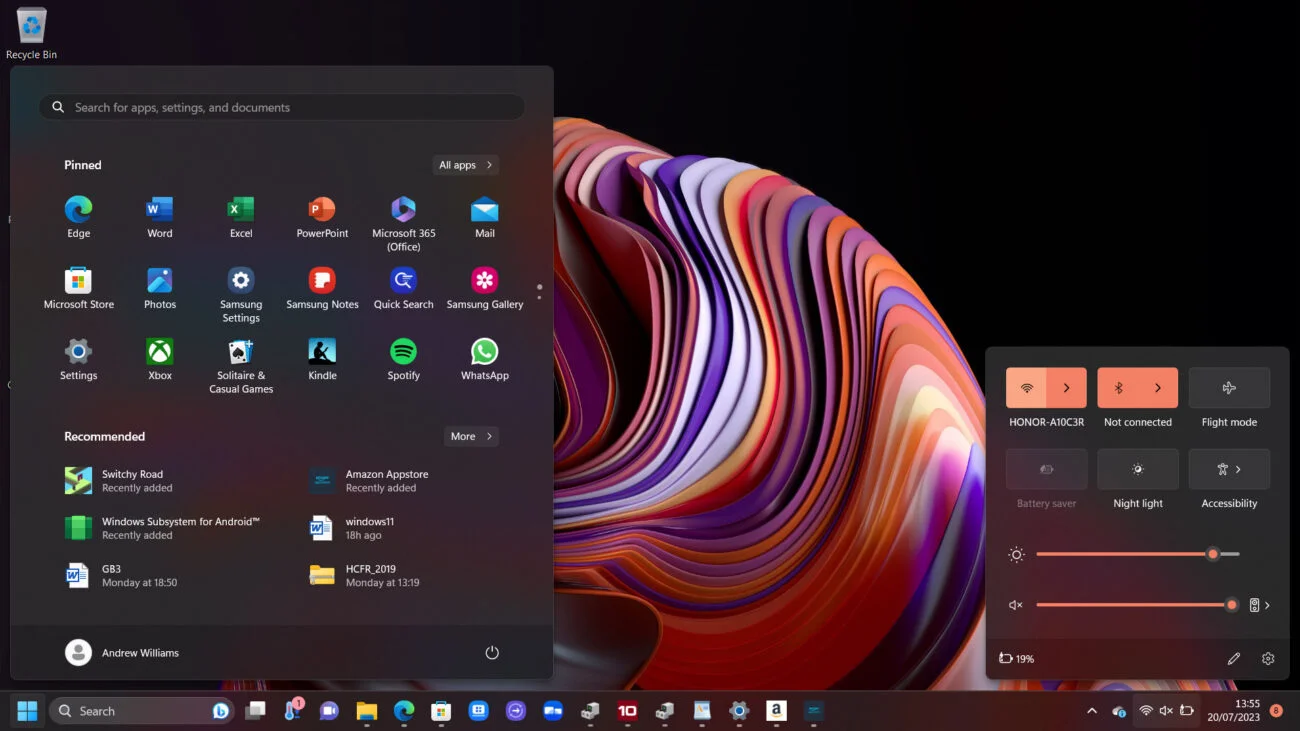
Windows 11’s redesigned Start Menu places emphasis on simplicity, but it also allows for a great deal of customization to meet your needs. Here’s how you can tweak it for efficiency:
Pin your most-used apps: Simply right-click on any app in the Start menu and select “Pin to Start” to have quick access.
Organize pinned apps: Drag and drop apps into groups or reorder them to reflect how often you use them.
Resize the Start Menu: Go to Settings > Personalization > Start, where you can change the layout and decide how many app icons you want to see at a glance.
Use the search bar: Start typing the name of any app or file in the Start Menu’s search bar. Windows 11’s search feature is highly responsive and can find documents, apps, settings, and even web results instantly.
By optimizing the Start Menu, you reduce the time spent searching for your frequently used apps or files, making this a simple but impactful time-saver.
3. Enhance Multitasking with Snap Layouts and Desktops
Multitasking has received a major overhaul in Windows 11, particularly with the introduction of Snap Layouts and improved virtual desktops. These features help keep your workspace organized and allow you to manage multiple tasks efficiently.
Snap Layouts: Hover over the maximize button of any window to reveal pre-set layouts for organizing windows on your screen. Select your desired layout and Windows will automatically arrange your open apps. This feature is perfect for multitasking, as it lets you run multiple programs side-by-side without manually resizing each window.
Snap Groups: When you group apps using Snap Layouts, Windows 11 remembers them. You can easily return to the same group later by hovering over the app in the taskbar. This eliminates the need to reopen each app and manually rearrange them every time.
Multiple Desktops: Windows 11 allows you to create and manage multiple virtual desktops. This is particularly useful if you want to separate work from personal tasks. Use Windows + Tab to access the Task View, where you can create a new desktop, move apps between desktops, and switch between them seamlessly.
Desktops Customization: You can assign different wallpapers to each virtual desktop to make them easily distinguishable. This small visual cue can help you switch between tasks faster and more efficiently.
By utilizing Snap Layouts and virtual desktops, you can keep your workspace clutter-free, leading to more focused work sessions and faster task completion.
4. Utilize Widgets for Real-Time Information
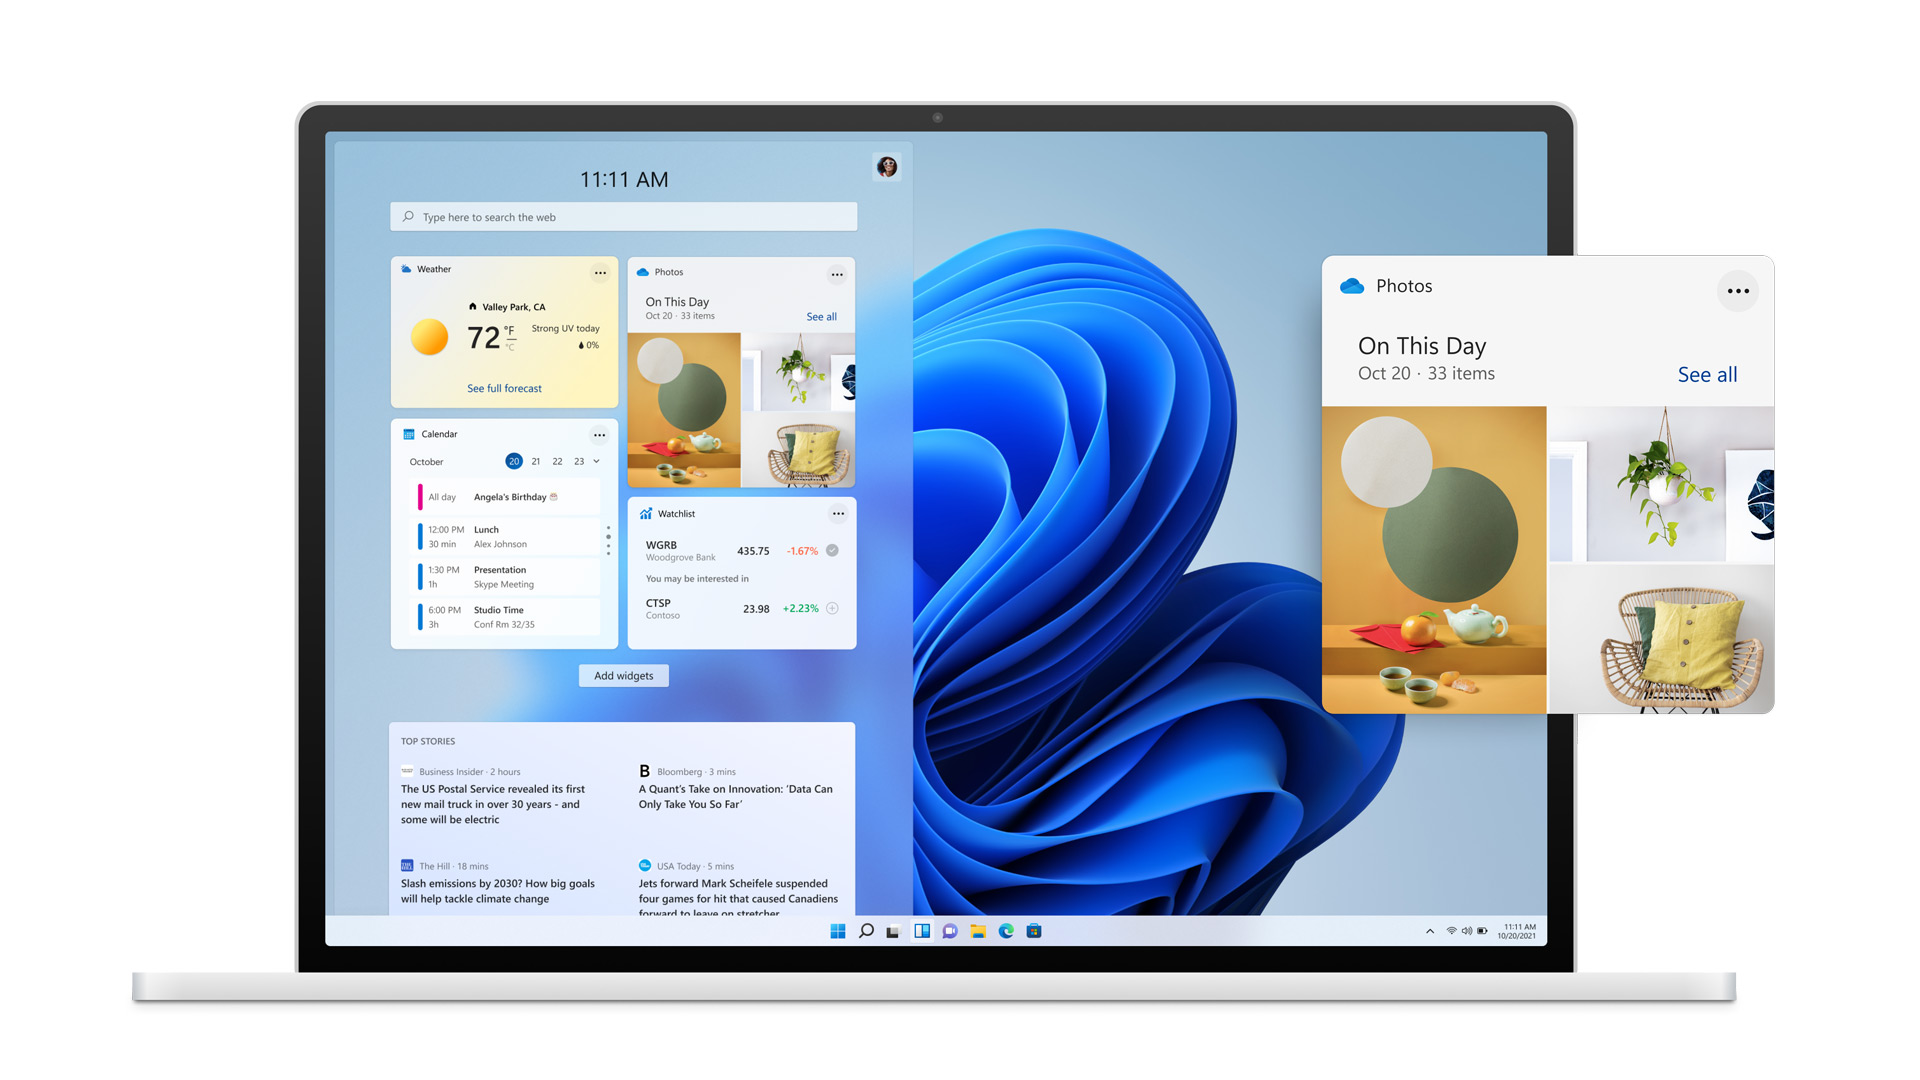
Windows 11 introduces Widgets, which provide at-a-glance information tailored to your interests. While these widgets can seem like a cosmetic addition, they’re designed to streamline your workflow by offering quick access to information without opening a browser or app.
Customizing Widgets: Click on the widget icon in the taskbar (a square with a split screen) to see widgets like weather, news, stocks, and calendar events. To add, remove, or customize widgets, click the three dots in the upper-right corner of any widget.
Personalized Information: You can configure widgets to display only the information you care about. For example, keep a close eye on your upcoming meetings with the calendar widget or track your stocks without opening any separate app.
This feature helps you keep essential information at your fingertips, reducing the need to jump between different programs or websites for updates, saving you valuable time.
5. Speed Up with File Explorer Shortcuts and Tricks
File Explorer in Windows 11 has been redesigned to be more efficient, but you can further optimize your experience with a few handy tricks.
Quick Access: Pin your most-used folders to Quick Access for easy retrieval. Right-click on any folder and select “Pin to Quick Access.” This feature places your most-used directories at the top of the File Explorer sidebar.
Batch Rename Files: Select multiple files, right-click, and choose “Rename.” Windows will allow you to rename all selected files with the same base name while adding sequential numbers.
Preview Files Without Opening Them: Press Alt + P in File Explorer to bring up the preview pane, which lets you see the contents of text documents, images, and videos without fully opening them.
Use Tabs (if available): With potential updates, Windows 11 might introduce a tab feature in File Explorer. Tabs allow you to keep multiple directories open without cluttering your taskbar, much like a web browser.
These File Explorer tips are small but powerful. They eliminate extra steps when managing your files, which is especially helpful if you frequently deal with large volumes of documents.
6. Use Focus Sessions to Minimize Distractions
Focus Sessions, a new feature in Windows 11, integrates with the Clock app to help you block out distractions and maintain productivity. If you’re looking to stay on task, this feature will prove invaluable.
Setting Up Focus Sessions: Open the Clock app and navigate to the Focus Sessions tab. You can choose how long you’d like to focus and even sync it with your Microsoft To-Do list for task management.
Spotify Integration: If music helps you concentrate, Focus Sessions integrates Spotify, allowing you to play background music while staying productive.
Disabling Notifications: Focus Sessions automatically activates “Do Not Disturb” mode, which silences notifications for the duration of your focus time.
This feature allows you to concentrate on tasks without the constant interruption of alerts and notifications, making it easier to meet deadlines and work uninterrupted.
7. Optimize Performance with Power and Battery Settings
Windows 11 has revamped power and battery settings to help users optimize their devices for performance or battery life, depending on their needs.
Power Mode Settings: Go to Settings > System > Power & Battery. From here, you can choose between three power modes: Best Power Efficiency, Balanced, and Best Performance. Selecting the right mode can either prolong your battery life or enhance your system’s speed.
Battery Saver: When you’re running low on battery, enable Battery Saver mode, which reduces background activity and dims your screen to extend usage time.
Background App Management: To further enhance performance, limit background apps that consume CPU power and battery. In Settings > Apps > Apps & Features, you can disable apps from running in the background by default.
By fine-tuning your power settings, you can optimize your device for maximum performance when plugged in or extend your battery life when on the go, both of which contribute to smoother, more efficient usage.
8. Automate with Windows 11’s Voice Typing and Commands
Voice typing is another great feature in Windows 11, allowing you to dictate text instead of typing, which can be a huge time-saver.
Activating Voice Typing: Press Windows + H to launch the voice typing tool. Start speaking, and Windows will convert your speech to text in real time.
Punctuation: The voice typing tool can also recognize common punctuation marks. Simply say “period,” “comma,” “question mark,” etc., and Windows will insert them into your text.
Voice Commands: In addition to dictation, you can issue basic commands like “new line” or “delete” to refine your text without touching the keyboard.
This tool is particularly useful if you’re multitasking, creating long documents, or simply want to reduce your reliance on the keyboard.
9. Maximize Control with Advanced Touchpad and Gestures
For users on touch-enabled devices, Windows 11 provides enhanced touchpad gestures that make navigation smoother and faster.
Customizing Gestures: Go to Settings > Bluetooth & Devices > Touchpad, where you can configure the number of fingers required for specific tasks. For example, three-finger swipes can be set to switch between apps, while a four-finger tap can open the notification center.
Precision Touchpad: If your device supports it, Windows 11 includes precision touchpad settings, which allow for more nuanced control over scrolling, zooming, and multitasking.
Touchscreen Shortcuts: On a touchscreen device, you can use gestures like swiping from the left to open Task View or from the right to bring up notifications.
Gestures can significantly reduce the time spent switching between apps or searching for features, especially for users who prefer touch-based navigation.
10. Supercharge Your Experience with PowerToys
Microsoft’s PowerToys, a collection of utilities designed to enhance productivity, is fully compatible with Windows 11. PowerToys offers several tools that can streamline your daily workflow.
FancyZones: A window manager that lets you create complex window layouts. Instead of relying on Snap Layouts, you can design your own configurations and snap windows to your custom zones.
Keyboard Manager: Remap your keys or create your own keyboard shortcuts to eliminate unnecessary steps in your workflow.
PowerRename: Batch rename files with advanced search and replace functionality.
Image Resizer: Resize multiple images at once directly from File Explorer, saving time on repetitive image editing tasks.
Installing PowerToys gives you access to a range of advanced features that can significantly enhance your productivity, making it an indispensable tool for power users.
11. Optimize Notifications and Focus Assist for a Distraction-Free Environment
Windows 11’s notifications and Focus Assist features are designed to keep you informed while helping you maintain focus during critical tasks. Managing notifications efficiently can significantly reduce unnecessary distractions and boost productivity.
Focus Assist: Windows 11 offers Focus Assist, which automatically filters notifications based on your preferences. To enable this, go to Settings > System > Focus Assist, where you can set rules for when notifications should be silenced—such as during work hours or when you’re playing games.
Priority Notifications: Customize which apps or contacts can break through Focus Assist. You can create a priority list that allows certain notifications (like work-related emails or calendar reminders) while blocking others.
Quiet Hours Scheduling: You can schedule quiet hours to automatically disable notifications during specific times, allowing you to focus without manually toggling settings.
Action Center Management: Access the Action Center by clicking on the notifications icon in the taskbar (or pressing Windows + A). From here, you can quickly adjust notification settings, including toggling Wi-Fi, Bluetooth, and Focus Assist.
By customizing notifications and Focus Assist, you can eliminate time wasted on distractions and create a smoother workflow, helping you stay in the zone for longer periods.
12. Make the Most of Microsoft Edge and Web Browsing
With Microsoft Edge’s deep integration into Windows 11, you can unlock a more efficient browsing experience. Edge is optimized for speed, security, and performance, making it the go-to browser for many Windows users.
Collections: Edge allows you to organize your browsing with Collections, a feature that lets you save and categorize groups of websites, images, or notes for later reference. This is particularly useful for research-heavy projects where multiple tabs can quickly become overwhelming.
Vertical Tabs: If you often work with dozens of tabs, switching to vertical tabs can save you time. This feature allows you to view all your open tabs in a vertical column on the side of the screen, making it easier to manage multiple pages.
Startup Boost: Enable Edge’s Startup Boost to launch the browser faster, even after a restart. To enable this, go to Edge settings under System and Performance, and toggle on Startup Boost.
Sleeping Tabs: Edge also comes with a Sleeping Tabs feature that automatically puts inactive tabs to sleep, freeing up system resources. To configure this, head to Settings > System and Performance, and enable Sleeping Tabs.
These Edge features allow for more organized and efficient browsing, reducing the time spent sorting through tabs or waiting for the browser to load content-heavy pages.
13. Customize the Taskbar for Faster Access to Essential Tools
The Windows 11 Taskbar is sleek and highly customizable, allowing you to access important tools and apps faster.
Pin Apps to Taskbar: Pin your most-used apps directly to the taskbar by right-clicking an app in the Start Menu and selecting “Pin to Taskbar.” This gives you one-click access to frequently used applications.
Rearrange Taskbar Icons: You can also rearrange icons on the taskbar by dragging them to your preferred order. For example, keep work-related apps on one side and personal apps on the other for quick navigation.
Taskbar Alignment: By default, the Start button and icons are centred, but you can move them back to the left if you prefer a more traditional look. Go to Settings > Personalization > Taskbar, and under “Taskbar behaviors,” change the taskbar alignment.
Taskbar Widgets: Add useful widgets, such as the weather forecast, calendar, or news updates, to your taskbar for instant access without needing to open separate apps.
A well-organized taskbar can shave off precious seconds from your day by putting the tools you need most within easy reach, eliminating the need for extra clicks.
14. Manage Apps and Background Processes to Improve System Performance
Having too many apps running in the background can slow down your system and waste valuable time. Managing these apps and processes can help optimize system performance, ensuring your computer runs faster and more smoothly.
Startup Apps: Control which apps launch at startup by navigating to Settings > Apps > Startup. Disable unnecessary apps from running automatically at boot-up to reduce load times.
Background Apps: Many apps continue running in the background even when you’re not actively using them, which can drain system resources. Go to Settings > Privacy & Security > Background apps and turn off apps that you don’t need running in the background.
Task Manager Monitoring: Use the Task Manager (press Ctrl + Shift + Esc) to monitor which programs are using the most CPU, memory, and disk space. If you notice certain apps consuming more resources than necessary, close them or adjust their settings to prevent them from affecting system performance.
By managing startup apps and background processes, you’ll speed up your system, making it more responsive and reducing the time spent waiting for programs to load or run smoothly.
15. Unlock the Power of the Command Prompt and PowerShell
For advanced users, Command Prompt and PowerShell are incredibly powerful tools that can automate complex tasks, troubleshoot issues, and manage the system more efficiently.
Open Command Prompt as Admin: Access the Command Prompt with administrative privileges by right-clicking the Start Menu button and selecting “Windows Terminal (Admin).” This gives you elevated permissions to run powerful system commands.
PowerShell Scripting: PowerShell allows you to automate repetitive tasks and manage system configurations more efficiently. For example, you can create scripts to automatically back up files, install updates, or even configure network settings.
Command Shortcuts: Use command-line shortcuts such as ipconfig to quickly retrieve network information or sfc /scannow to scan for and repair corrupted system files. These shortcuts can significantly cut down troubleshooting time.
Windows Terminal: With Windows 11, you can use the new Windows Terminal, which combines Command Prompt, PowerShell, and other shells into a single app. This consolidation allows you to switch between various command-line tools easily and run tasks in parallel.
Once you familiarize yourself with Command Prompt and PowerShell, you’ll find that many administrative tasks can be completed much faster compared to using the graphical interface, saving you time in the long run.
16. Manage Files More Efficiently with OneDrive Integration
Windows 11 offers deep integration with OneDrive, Microsoft’s cloud storage service. This enables you to manage files across devices and access them instantly without needing to search through local directories.
Sync Files Automatically: Set up OneDrive to sync specific folders automatically, such as your Documents, Desktop, or Pictures folders. This ensures that your important files are backed up in real-time, accessible across multiple devices, and retrievable even if something happens to your computer.
On-Demand Files: OneDrive’s Files On-Demand feature saves space by allowing you to view and access files in the cloud without downloading them to your device. You can choose to only download files when you need them, which helps free up disk space and keeps your device running smoothly.
Version History: If you make a mistake or need to revert a file to a previous state, OneDrive offers version history, allowing you to recover earlier versions of documents.
Share Files with Ease: OneDrive makes sharing files with others incredibly simple. Just right-click on a file in File Explorer and select Share. You can generate a sharing link or set permissions, allowing for real-time collaboration with others.
Leveraging OneDrive for file management and backup not only saves time but also ensures your important files are safe and easily accessible, regardless of the device you’re using.
17. Manage Windows Updates Efficiently
Windows 11 automatically manages updates to keep your system secure and up to date, but it’s important to manage updates in a way that fits your schedule and minimizes interruptions.
Schedule Restarts: Instead of letting Windows restart at inconvenient times, you can schedule system restarts after updates. Navigate to Settings > Windows Update and select “Schedule the restart” so that your system restarts during off-hours.
Pause Updates: If you’re working on something critical and don’t want to risk interruptions, you can pause updates for up to 35 days. Go to Settings > Windows Update and click Pause updates.
Check for Optional Updates: Windows 11 sometimes has optional updates for drivers or non-critical features that can improve system performance or compatibility with other software. Under Settings > Windows Update, select Advanced options, then check for optional updates to install relevant improvements.
By managing Windows Updates effectively, you reduce downtime and avoid interruptions during key moments, keeping your workflow smooth and uninterrupted.
18. Use Task View for Enhanced Workflow Management
Task View is another multitasking feature in Windows 11 that allows you to manage open apps and windows more efficiently.
Quick Task Switching: Press Windows + Tab to open Task View, where you can see all your open apps and windows. This gives you an overview of your current workspace, making it easy to switch between tasks or locate specific windows.
Timeline Feature: In Task View, you’ll also see a history of your activity. This timeline includes recently opened files, apps, and webpages, allowing you to quickly pick up where you left off, even if you closed the app or restarted your device.
Drag-and-Drop Functionality: You can also drag windows between virtual desktops, making it easy to organize and rearrange your workspace according to the project you’re working on.
Task View provides a streamlined way to manage your workspace and quickly switch between tasks, eliminating the frustration of searching for open windows or recently used files.
19. Use Virtual Desktops to Organize Your Workflow
Windows 11’s improved virtual desktops feature allows you to create multiple desktops to separate different tasks or work environments, helping to declutter your main workspace.
Create New Desktops: Open Task View by pressing Windows + Tab, then click New Desktop to create a new virtual desktop. You can name desktops based on your tasks, such as “Work,” “Personal,” or “Projects,” and switch between them quickly.
Drag Apps Between Desktops: Move apps and windows between different virtual desktops by dragging them in the Task View interface.
Close Desktops Without Losing Work: If you close a virtual desktop, any open windows or apps on that desktop are automatically moved to another active desktop, ensuring you don’t lose any progress.
By organizing your work across multiple desktops, you’ll avoid clutter and distractions, making it easier to focus on the task at hand and locate relevant apps and files quickly.
20. Boost Performance with Disk Cleanup and Storage Sense
Over time, your system can accumulate temporary files, caches, and other data that can slow down your computer. Windows 11 includes tools to clean up unnecessary files and optimize storage space.
Disk Cleanup: Run the built-in Disk Cleanup tool to remove unnecessary files such as temporary files, system caches, and old updates. To access Disk Cleanup, type Disk Cleanup in the Start Menu search bar and select the drive you want to clean.
Storage Sense: Enable Storage Sense to automatically clean up files and free up disk space. Go to Settings > System > Storage, then toggle on Storage Sense. You can configure it to delete temporary files, empty the recycle bin after a set time, and clean up downloaded files that haven’t been used recently.
Optimize Drives: Ensure your hard drive or SSD is running optimally by periodically using the Defragment and Optimize Drives tool. This can help improve performance, especially for older drives.
Using Disk Cleanup and Storage Sense regularly helps maintain system performance and prevents your device from slowing down due to clutter, ensuring a smoother, faster experience.
21. Boost Productivity with the Windows 11 Clipboard History
Clipboard history is an incredibly useful feature in Windows 11, especially if you often copy and paste information. Instead of being limited to only one copied item, you can access a full history of everything you’ve copied during your session.
Activate Clipboard History: Press Windows + V to access the clipboard history. If it’s your first time using it, you’ll be prompted to turn it on. This feature allows you to view and paste from a list of previously copied items, including text, images, and links.
Pin Frequently Used Items: In the clipboard history window, you can pin items that you frequently copy and paste. Right-click any item in the history and select Pin to keep it available even after a restart.
Clear Clipboard Data: If you want to clear your clipboard for privacy or organizational purposes, you can do so directly from the clipboard history window by clicking Clear All.
This feature eliminates the need to constantly re-copy items, making it especially useful for tasks like filling out forms, drafting documents, or working with multiple pieces of content.
22. Manage Storage More Effectively with Advanced File Compression
Windows 11 offers built-in tools for compressing files and folders, which can save disk space and make file transfers quicker.
Compress Files: Right-click any file or folder, choose Send to, and then click Compressed (zipped) folder. This will create a .zip file, reducing the size of the content, which is useful for sending files via email or conserving storage.
Extracting Files: When receiving zipped files, you can extract them by right-clicking the zip file and selecting Extract All. You can choose where you want the extracted files to go.
Third-Party Tools: For more advanced compression options, consider using third-party tools like WinRAR or 7-Zip. These tools offer additional compression formats, like RAR or TAR, and can achieve higher compression ratios than Windows’ built-in tool.
File compression helps manage storage more efficiently, reducing clutter and enabling faster file transfers—especially useful for large projects or frequent file sharing.
23. Improve Battery Life on Laptops with Battery Saver Mode
For laptop users, managing battery life is critical for uninterrupted work sessions. Windows 11 includes several settings to extend battery life and optimize performance when you’re on the go.
Enable Battery Saver: When your battery dips below 20%, Battery Saver mode automatically kicks in, reducing background activity and dimming your display to conserve energy. You can manually activate it by going to Settings > System > Power & Battery and turning on Battery Saver.
Lower Screen Brightness: Screen brightness is a major battery drain. Manually adjust the brightness through Settings > System > Display, or use the quick settings menu to lower it to a comfortable level.
Disable Background Apps: Go to Settings > Apps > Apps & Features, and disable background activity for apps that you don’t need while on battery power. This can significantly reduce energy consumption by preventing unnecessary processes from running in the background.
By carefully managing these power settings, you can extend the life of your battery, especially during long work sessions without access to a power outlet.
24. Increase Speed and Stability with ReadyBoost
If your PC has an older hard drive, Windows 11’s ReadyBoost feature can help improve performance by using a USB flash drive as additional memory.
Set Up ReadyBoost: Plug a USB drive into your PC, right-click it in File Explorer, and select Properties. Navigate to the ReadyBoost tab, where you can allocate space on the drive to act as additional RAM. This can improve performance by supplementing your system memory, particularly on low-end devices.
Performance Gains: While not as effective as installing more RAM, ReadyBoost can help improve performance on older computers by speeding up disk access, especially for users with traditional hard drives (HDD) instead of solid-state drives (SSDs).
This simple tweak can lead to noticeable improvements in system responsiveness, especially for older hardware.
25. Use Virtualization Features Like Hyper-V
Windows 11 Pro includes Hyper-V, a native virtualization tool that allows you to create virtual machines (VMs). Virtual machines are a great way to test software, run different operating systems, or create isolated environments for specific tasks.
Enable Hyper-V: Go to Control Panel > Programs > Turn Windows features on or off, then check the box for Hyper-V and restart your PC.
Create Virtual Machines: Use Hyper-V Manager to create new virtual machines. You can install another version of Windows, Linux, or other operating systems in a virtual environment, providing a safe space to experiment without affecting your primary system.
Snapshots for Easy Rollback: One of the major benefits of virtualization is the ability to create snapshots of your VM’s state. If something goes wrong, you can easily roll back to a previous snapshot, saving you time in troubleshooting.
For users who need to test applications in different environments or want to isolate potentially risky software, Hyper-V is a powerful and efficient solution.
26. Automate Tasks with Task Scheduler
Task automation is a huge time-saver, and Windows 11’s Task Scheduler makes it easy to automate repetitive tasks such as running scripts, performing backups, or launching applications at specified times.
Set Up a New Task: Open Task Scheduler by typing it in the Start menu search bar. Click Create Task and follow the prompts to define when and how the task should run.
Choose Triggers and Actions: You can set triggers, like scheduling a task to run daily, weekly, or upon certain system events (like startup). Similarly, actions can range from launching apps to executing scripts.
Use for Backups: One practical use of Task Scheduler is automating backups. For example, you could create a task that automatically copies important files to an external drive at a scheduled time.
By automating tasks, you free up mental space and eliminate the need to manually initiate routine processes.
27. Use Nearby Sharing to Transfer Files Between Devices
Windows 11 includes a feature called Nearby Sharing, which allows you to wirelessly share files and links between devices running Windows 11 or Windows 10 that are within range.
Enable Nearby Sharing: Go to Settings > System > Nearby Sharing and toggle it on. You can choose to share with all nearby devices or just those in your Microsoft account.
Quick File Transfer: To share a file, right-click on it and choose Share. From the sharing window, select the nearby device you want to send the file to.
Clipboard Sharing: You can also share clipboard content (like text or links) between devices using Nearby Sharing, allowing you to copy on one device and paste on another seamlessly.
This feature is especially useful when transferring files between a desktop and a laptop or when collaborating with others in the same physical space.
28. Take Advantage of the DirectStorage API for Faster Game Loading
For gamers, Windows 11 introduces DirectStorage, a feature that allows games to load assets directly from your NVMe SSD to the GPU, bypassing the CPU for faster load times and improved performance.
System Requirements: DirectStorage requires an NVMe SSD and a DirectX 12-capable GPU, both of which are necessary to take full advantage of the technology.
Gaming Benefits: Games that support DirectStorage will see reduced load times and smoother performance, particularly in open-world games where large assets need to be streamed quickly.
This feature enhances gaming experiences by making load times virtually invisible and ensuring a smoother, more immersive experience.
29. Customize Windows 11 Themes for Quick Environment Switches
Customizing Windows 11 with themes allows you to switch between different visual setups depending on your mood or work environment.
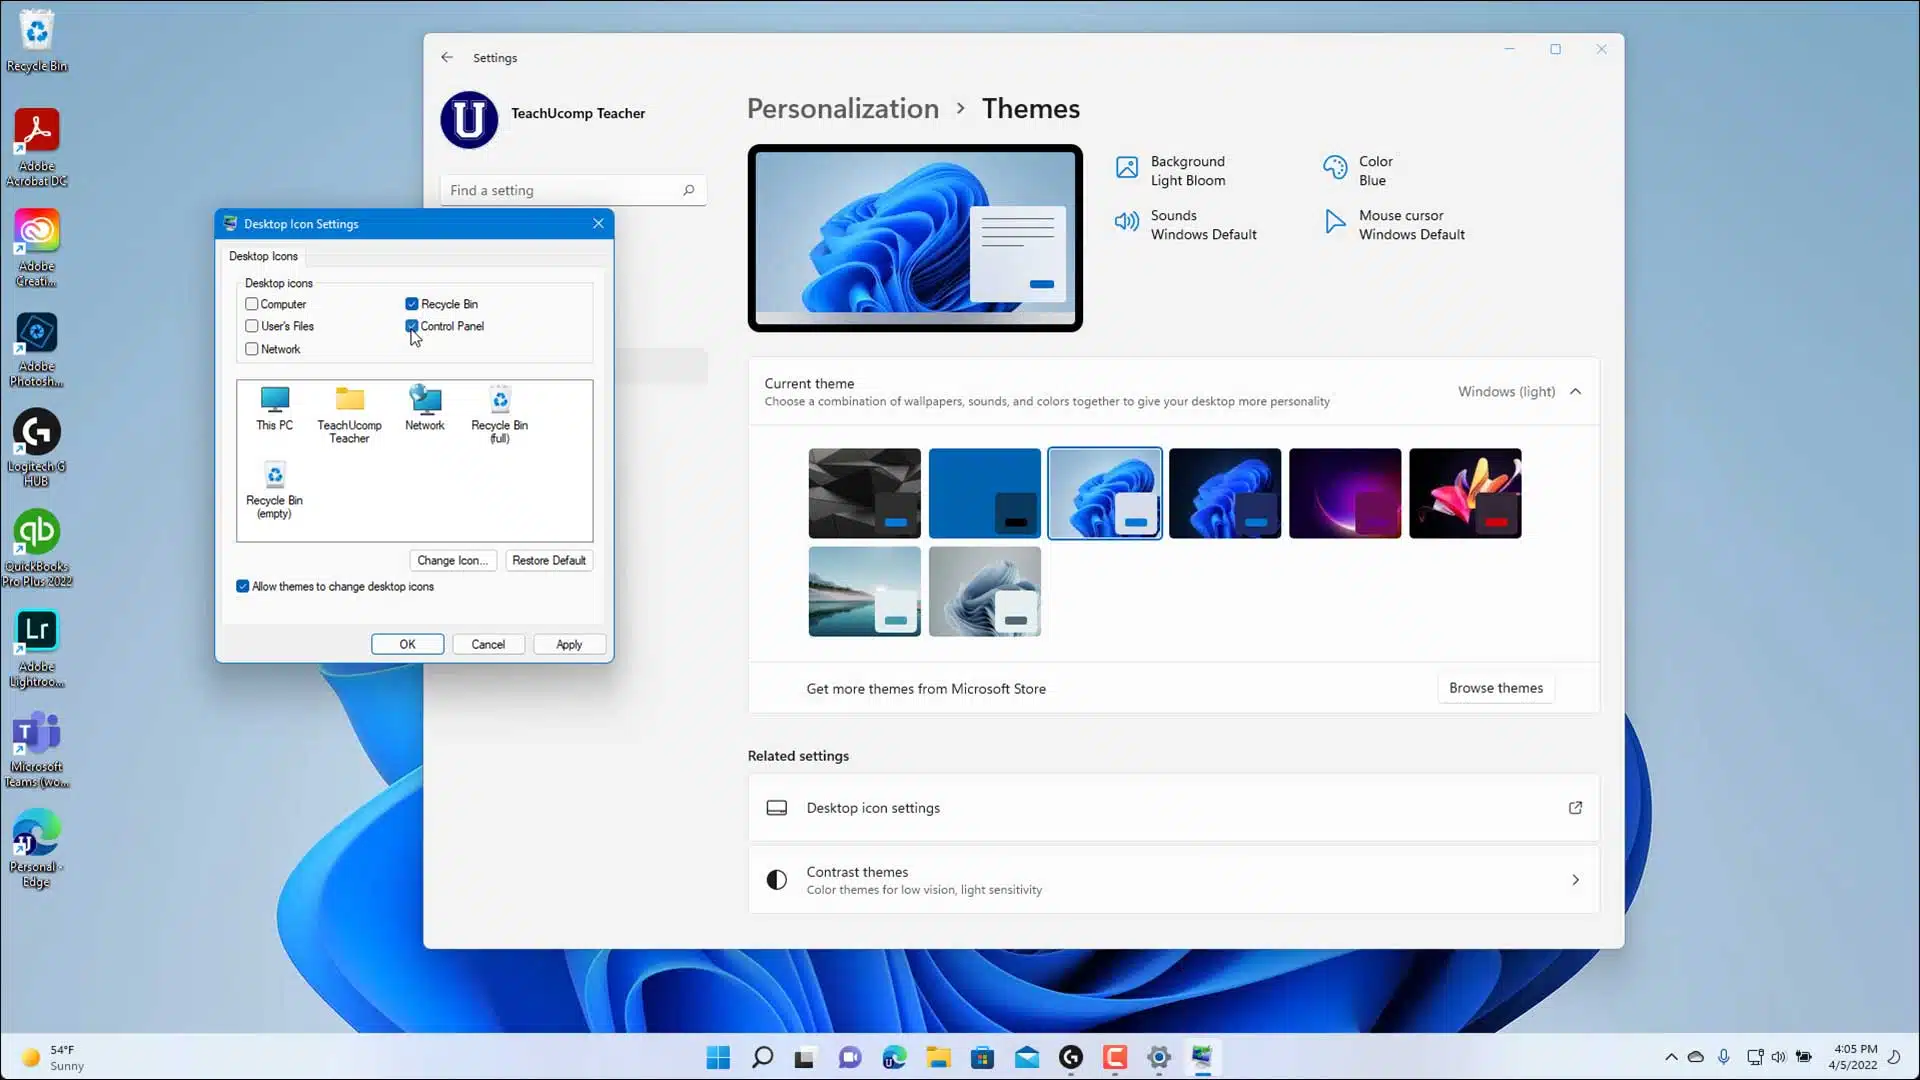
Choose or Create a Theme: Go to Settings > Personalization > Themes to select from pre-installed themes or create your own by customizing the background, colors, sounds, and mouse pointers.
Dark Mode and Light Mode: Windows 11 allows you to toggle between Dark Mode and Light Mode, which can help reduce eye strain during different times of the day.
Automate Theme Switching: Using Task Scheduler, you can even automate theme changes based on the time of day, so you automatically switch to Dark Mode at night and Light Mode during the day.
Themes make it easy to visually customize your workspace, helping you to create a more comfortable and personalized environment that boosts productivity.
30. Streamline File Organization with Tags and Metadata
One often overlooked feature of Windows 11 is the ability to add tags and metadata to files, which can greatly improve file organization and retrieval.
Adding Tags: Right-click on a file, choose Properties, and then go to the Details tab. Here you can add tags that describe the file, making it easier to search and find later.
Search by Tags: Once files are tagged, you can use Windows Search to find files based on those tags, which can save a lot of time when sorting through large volumes of documents.
Batch Edit Metadata: If you have multiple files that need the same tags, you can batch-edit their metadata by selecting all the files, right-clicking, and modifying their properties at once.
Using tags and metadata helps you stay organized and ensures that important files are never lost in a sea of similar documents.
31. Use Windows Subsystem for Linux (WSL) for Development
Windows Subsystem for Linux (WSL) allows developers and power users to run a full Linux distribution alongside Windows 11, offering the best of both worlds without needing a virtual machine.
Install WSL: Open PowerShell as an administrator and run the command wsl –install to set up the subsystem. After installation, you can choose which Linux distribution (like Ubuntu) you want to run.
Run Linux Commands: Once WSL is set up, you can open a terminal window and start running Linux commands directly from Windows. This is perfect for developers who need to use Linux tools, but don’t want to switch systems.
Seamless File Access: You can easily access your Windows files from WSL and vice versa, making it easy to transfer files between the two environments.
WSL is a time-saving feature for developers who require both Linux and Windows environments for their work, removing the need to dual boot or set up a full virtual machine.
32. Speed Up Startup with Fast Startup Mode
Windows 11’s Fast Startup feature helps your PC boot faster by saving the state of the operating system to a file upon shutdown.
Enable Fast Startup: Go to Control Panel > Power Options > Choose what the power buttons do, then check Turn on fast startup under shutdown settings. This ensures your PC boots up much quicker after being shut down.
Hibernate Mode: In addition to Fast Startup, Hibernate is another option that saves your work session to the hard drive, allowing you to resume exactly where you left off without using power.
Fast Startup can save significant time during your day, particularly if you frequently reboot or shut down your system.
33. Organize Your Desktop with Fences or Stardock
Keeping your desktop organized is crucial for maintaining a clean workflow. For advanced organization, you can use third-party tools like Fences or Stardock.
Fences by Stardock: This tool lets you group desktop icons into fenced-off areas, which can be minimized or expanded as needed. This is perfect for users who work with a large number of files and shortcuts on the desktop.
Folder Portals: Fences also offers Folder Portals, which let you create a portal to a folder on your desktop, enabling you to access its contents without opening File Explorer.
Auto-Sorting: You can set rules for how icons should be sorted into different fences, ensuring that your desktop always stays organized automatically.
By using tools like Fences, you’ll spend less time searching for files and more time focusing on your work, resulting in a more efficient desktop experience.
34. Use Emoji and Special Characters Easily with Windows 11’s Emoji Picker
Adding emojis or special characters to your documents, chats, or emails is easy with Windows 11’s built-in emoji picker.
Open Emoji Picker: Press Windows + . (period) to bring up the emoji picker. From here, you can browse emojis, GIFs, and even access symbols or special characters like currency signs, math symbols, and more.
Kaomojis and Symbols: Besides emojis, Windows 11 also includes Kaomojis (Japanese emoticon-style expressions) and a large variety of special symbols that can save time when typing out unique characters or faces.
The emoji picker is a quick and handy way to add personality or important symbols to your work without needing to search for them manually.
35. Pin Websites to the Taskbar for Faster Access
If you frequently use certain websites, you can save time by pinning them directly to your taskbar, making them accessible with just one click.
Pin in Microsoft Edge: Open the website in Edge, click the three dots in the upper-right corner, and select More Tools > Pin to the taskbar. The website will now appear as an icon on your taskbar, just like an app.
Pin in Chrome: If you’re using Chrome, go to Settings > More Tools > Create Shortcut, and choose whether to open the site in a new window or as a tab. You can also drag the site directly to your taskbar from there.
This trick is especially useful for web-based apps like Gmail, Slack, or Trello, allowing you to access your favourite sites without opening the browser first.
36. Boost Efficiency with Windows 11 Snap Layouts and Groups
Snap Layouts and Snap Groups in Windows 11 are powerful multitasking tools designed to help you arrange open windows and apps on your screen more efficiently. These features make multitasking simpler and faster, especially when juggling several apps.
Activate Snap Layouts: Hover over the maximize button on any window, and you’ll see pre-designed layouts that allow you to arrange multiple windows on your screen. You can choose from different configurations, such as side-by-side or a grid.
Create Snap Groups: Once you snap multiple apps into a layout, Windows remembers this arrangement as a Snap Group. You can easily switch between Snap Groups from the taskbar by hovering over an open app and selecting the saved group.
Shortcut for Snapping: You can also use keyboard shortcuts for Snap Layouts. For example, pressing Windows + Left Arrow snaps the current window to the left side of the screen, while Windows + Right Arrow snaps it to the right. Continue pressing the arrow keys to toggle between snapped positions.
By mastering Snap Layouts and Snap Groups, you can keep your workspace organized, ensuring quicker access to the apps you need most, while minimizing screen clutter.
37. Take Quick Screenshots and Recordings with Snipping Tool and Xbox Game Bar
Windows 11 offers multiple built-in tools for capturing screenshots and screen recordings, eliminating the need for third-party apps.
Snipping Tool: Press Windows + Shift + S to open the Snipping Tool, which lets you take a screenshot of your entire screen, a specific window, or a custom rectangular area. After capturing, you can annotate and save or share your screenshot immediately.
Xbox Game Bar: For screen recording, press Windows + G to open the Xbox Game Bar. This tool was initially designed for gaming but works for any app or window. You can record videos of your screen, capture screenshots, and even monitor your system’s performance.
Quick Screenshot: Press Windows + Print Screen to capture your entire screen. The image is automatically saved to Pictures > Screenshots.
These tools allow you to capture and share important information quickly, making them essential for users who regularly collaborate on projects or document processes.
38. Use Windows Key Shortcuts for Faster Navigation
Windows 11 introduces several new Windows Key shortcuts that can speed up your navigation and help you access key features with ease.
Windows + A: Open the Quick Settings panel, where you can adjust Wi-Fi, volume, brightness, Bluetooth, and more.
Windows + N: Open the Notification Center to quickly view notifications and your calendar.
Windows + W: Open the Widgets panel to access quick snippets of information such as weather, news, and to-do lists.
Windows + K: Open the Connect panel to quickly pair with wireless displays and audio devices.
Memorizing these Windows Key shortcuts allows you to navigate through Windows 11 more efficiently, reducing the need for mouse clicks and saving time on repetitive tasks.
39. Speed Up File Search with Enhanced Windows Search
The Search feature in Windows 11 is faster and more efficient than ever. You can use it to find files, settings, apps, and even web content, all from one convenient search bar.
Search from the Taskbar: Click the magnifying glass icon on the taskbar, or press Windows + S to open the search menu. Start typing the name of a file, app, or setting, and Windows will display results instantly.
Filter Search Results: Use the filter options at the top of the search menu to narrow down results by category, such as Apps, Documents, or Web. This allows you to find specific content more quickly.
Indexing Options: If you want Windows to search specific folders faster, adjust Indexing Options by typing it into the Start menu. You can choose which folders or drives to include in the index, speeding up search results in those locations.
By fine-tuning and using the Windows Search effectively, you can find files and apps much faster, saving time otherwise spent browsing through folders manually.
40. Utilize Virtual Desktops to Keep Your Workspace Organized
Virtual Desktops in Windows 11 allow you to create multiple desktops to separate your tasks and stay organized. This feature is especially helpful for those who handle diverse projects or work and personal tasks on the same machine.
Create New Desktops: Press Windows + Tab to open Task View, then click New Desktop at the top of the screen. Each virtual desktop can have its own set of apps and windows, keeping your workspace clutter-free.
Switch Between Desktops: Easily switch between desktops by pressing Windows + Ctrl + Left/Right Arrow, which helps you move quickly between your workspaces.
Drag and Drop Apps: You can drag windows from one desktop to another in Task View, making it easy to organize apps across different tasks or projects.
Using virtual desktops helps you stay focused on specific tasks without getting overwhelmed by too many open windows, improving your workflow efficiency.
41. Automate Repetitive Tasks with Windows Power Automate
Power Automate is a powerful automation tool included in Windows 11, enabling users to automate repetitive tasks across different apps and services.
Create Flows: Open Power Automate Desktop from the Start Menu and create workflows (called flows) that automate tasks like copying data from one app to another, downloading reports, or sending out email alerts.
Record Desktop Flows: You can record your actions within apps and replay them on-demand, allowing you to automate tasks like data entry or routine system maintenance without manual effort.
Template Flows: If you’re new to automation, Power Automate provides templates for common workflows, such as sending notifications when a file is updated or automating data exports.
Power Automate is a time-saver for anyone who deals with repetitive tasks, allowing you to set up efficient workflows that run in the background without your intervention.
42. Customize Your Display Settings for Improved Efficiency
Optimizing your display settings can help you work more efficiently, especially if you’re using multiple monitors or need specific screen arrangements.
Multiple Monitor Setups: Windows 11 supports advanced multi-monitor setups. Go to Settings > System > Display, where you can configure different display settings for each monitor, including resolution, scaling, and orientation. You can also drag apps across monitors seamlessly.
Adjust Scaling: If you’re using a high-resolution monitor, adjusting the display scaling can make text and icons easier to see without sacrificing screen real estate. Go to Settings > System > Display, and under Scale, choose the appropriate level of scaling for your display.
Night Light and HDR: Enable Night Light to reduce blue light in the evenings, which can reduce eye strain and help you wind down for sleep. If you have an HDR-compatible display, enable HDR to experience richer colors and greater detail.
Customizing your display setup not only reduces eye strain but also makes multitasking and productivity smoother, especially when using large screens or multiple monitors.
43. Manage and Optimize Startup Programs
Too many programs starting up when you log in can slow down your system. Managing your startup programs can drastically reduce boot times and make your computer feel faster.
Disable Unnecessary Startup Programs: Press Ctrl + Shift + Esc to open the Task Manager, then go to the Startup tab. Review the list of programs that launch at startup and disable any unnecessary ones by right-clicking and selecting Disable.
Startup Impact: Task Manager also displays the impact each program has on startup time. Prioritize disabling high-impact programs to see the greatest improvement in boot times.
Startup Apps in Settings: You can also manage startup programs through Settings > Apps > Startup, where you’ll see a list of all apps configured to start when you log in.
By disabling unnecessary startup programs, you’ll speed up your system’s boot time, allowing you to start working sooner without waiting for resource-heavy apps to load.
44. Customize File Explorer for Easier Navigation
File Explorer in Windows 11 is more streamlined than previous versions, but there are several customization options you can use to make navigating your files faster and more efficient.
Pin Frequently Used Folders: In Quick Access, right-click on your most-used folders and choose Pin to Quick Access. This makes these folders accessible from the top of the sidebar.
Enable File Extensions: By default, Windows hides file extensions, which can make it harder to distinguish between files of the same name but different formats. Go to View > Show > File name extensions in File Explorer to display file extensions.
Custom View Preferences: You can set default folder views (e.g., list, icons, details) for different types of content. Right-click in the folder, choose View, and select your preferred view.
These tweaks make File Explorer more intuitive, reducing the time spent searching for and organizing your files.
45. Speed Up Your Workflow with Microsoft To Do and Sticky Notes
Staying organized is key to working efficiently, and Windows 11 offers built-in tools like Microsoft To Do and Sticky Notes to help you manage your tasks.
Microsoft To Do: You can create lists, set reminders, and track progress for different tasks. The app syncs across devices, meaning you can access your lists on your phone, tablet, or desktop.
Integrate with Outlook: If you use Outlook, tasks from your email can automatically sync with Microsoft To Do, making it easier to stay on top of work-related tasks without switching between apps.
Sticky Notes: Use Sticky Notes to jot down quick thoughts, ideas, or reminders. They appear directly on your desktop and can be resized and customized in terms of color, making them easy to spot.
These tools are ideal for keeping track of your tasks, ensuring you stay on top of projects without wasting time switching between multiple apps or devices.
46. Boost Security and Save Time with Windows Hello
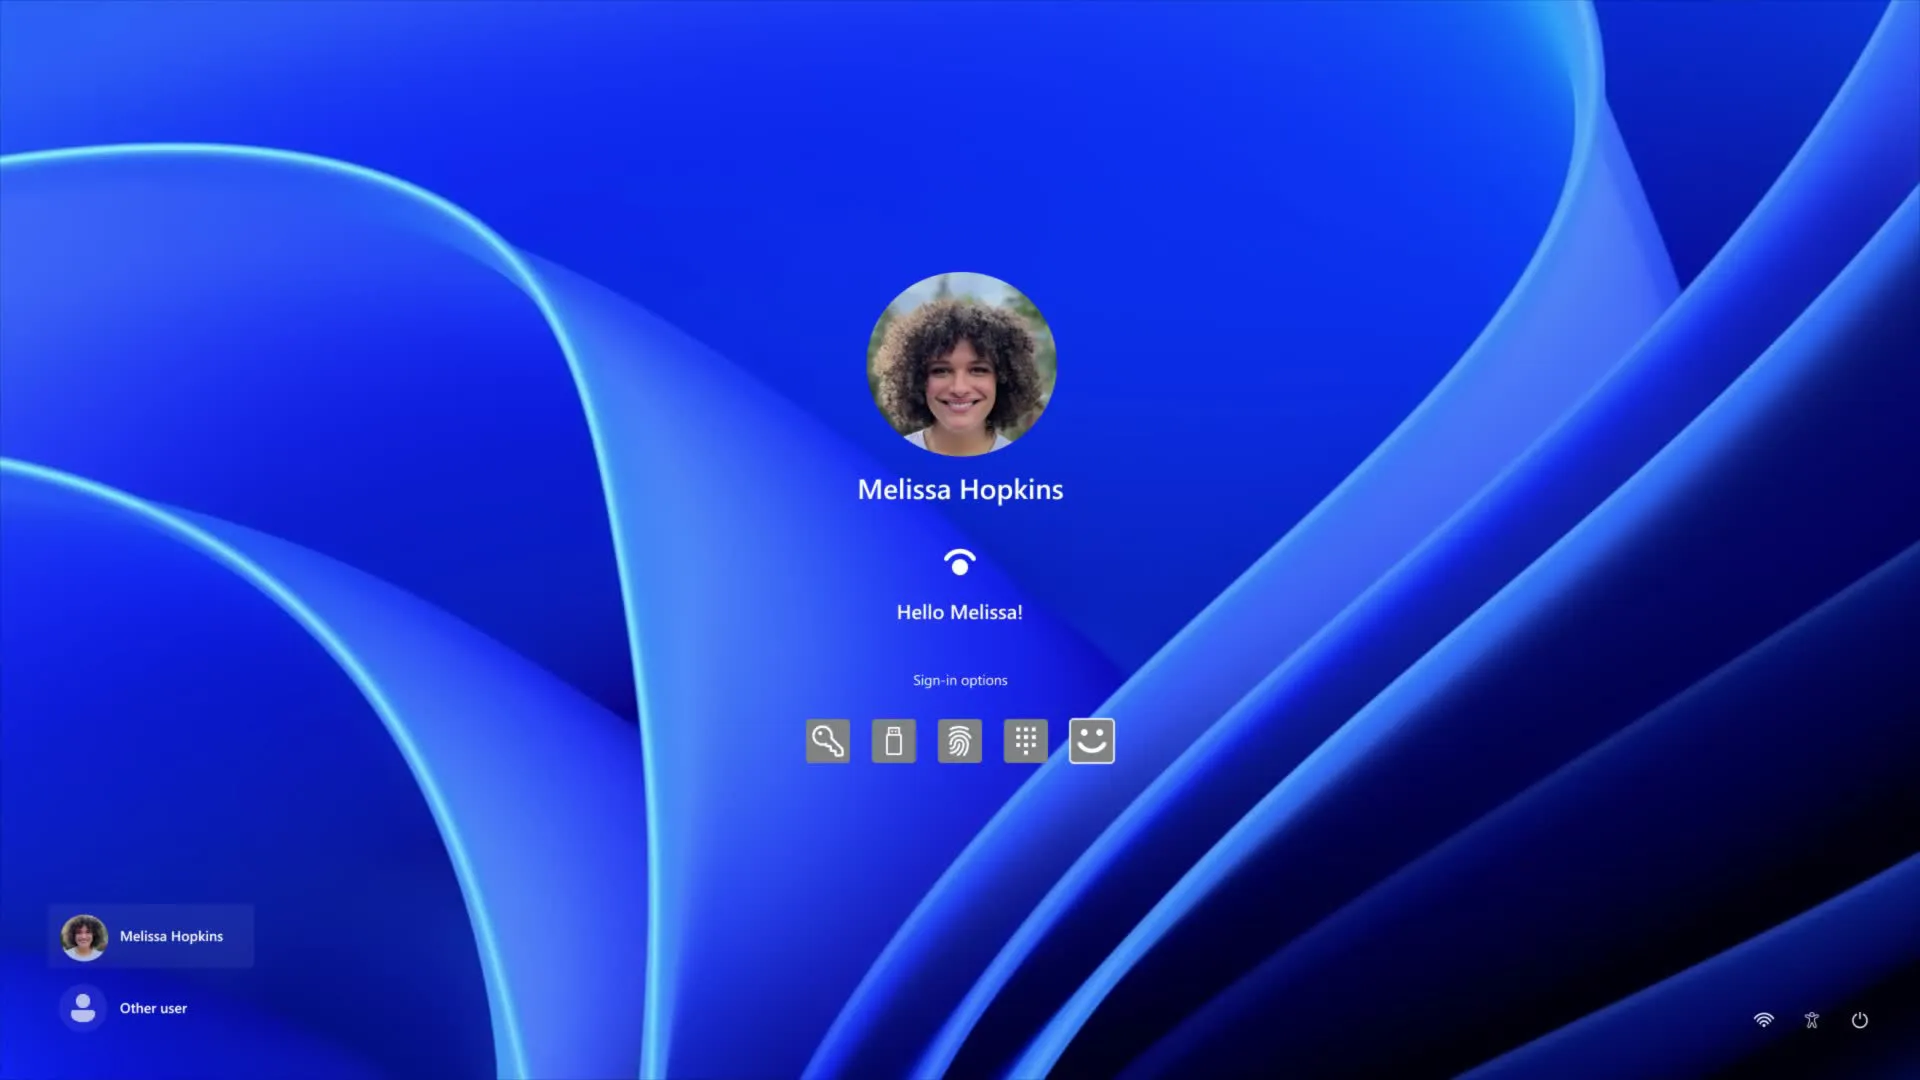
Windows 11 includes Windows Hello, a biometric authentication system that allows you to log in faster and more securely using facial recognition, fingerprints, or a PIN code.
Set Up Windows Hello: Go to Settings > Accounts > Sign-in options, where you can configure Windows Hello for face recognition, fingerprint, or a PIN. This eliminates the need to type a password every time you log in.
Secure Your Apps: Some apps, like banking or email apps, support Windows Hello for faster and more secure logins. Look for integration options within those apps to enable biometric authentication.
Unlock Devices Faster: If you frequently unlock your computer throughout the day, Windows Hello saves time by allowing you to instantly log in with just a glance or a touch, without sacrificing security.
Windows Hello speeds up the login process while enhancing your device’s security, making it a smart addition for users looking to streamline their experience.
47. Use Task View to Manage Open Apps More Efficiently
Task View in Windows 11 helps you manage open apps and windows more efficiently, making it easier to switch between tasks without losing focus.
Open Task View: Press Windows + Tab to see all your open windows and desktops in one view. You can switch between open apps or close unnecessary ones without hunting for them individually.
Timeline Feature: Task View also includes a Timeline that shows recently opened files, apps, and web pages. This allows you to quickly resume work on previous tasks.
Reopen Closed Apps: If you accidentally close an app, Task View helps you reopen it from the timeline, reducing the time spent searching through File Explorer or web history.
Using Task View helps you stay organized and focused, especially when managing multiple projects or jumping between apps frequently.
48. Enable Dynamic Lock for Automatic Security
Dynamic Lock in Windows 11 automatically locks your computer when you walk away, using Bluetooth connectivity to detect when your paired device (like a phone or smartwatch) moves out of range.
Enable Dynamic Lock: Go to Settings > Accounts > Sign-in options and toggle on Dynamic Lock. Pair your Bluetooth device (like a smartphone), and Windows will automatically lock the screen when your device is no longer in proximity.
Instant Locking: This feature is especially useful in work environments or shared spaces where leaving your computer unlocked can pose a security risk. With Dynamic Lock, your system locks automatically, eliminating the need for manual intervention.
Dynamic Lock ensures that your device is secure even if you forget to lock it yourself, saving time and providing peace of mind.
49. Speed Up with Storage Sense for Automatic Disk Cleanup
Storage Sense in Windows 11 automates disk cleanup, freeing up space by deleting temporary files, old system updates, and items in the Recycle Bin without manual effort.
Enable Storage Sense: Go to Settings > System > Storage, then toggle on Storage Sense. You can customize when and how often it cleans up your system, as well as which types of files to delete.
Recycle Bin Cleanup: Set Storage Sense to automatically delete files from your Recycle Bin after a certain period (e.g., 30 days). This prevents your system from being bogged down with unnecessary files.
Clean Up Downloads: Storage Sense can also be configured to delete files in your Downloads folder that haven’t been accessed in a set amount of time, ensuring your system stays clutter-free.
By using Storage Sense, you keep your computer running smoothly without needing to remember to manually clear out old files or temporary data.
50. Sync and Share Files with OneDrive Integration
OneDrive, Microsoft’s cloud storage service, is deeply integrated into Windows 11, providing a seamless way to back up, sync, and share your files across devices.
Automatic Sync: Set up OneDrive to automatically sync your Desktop, Documents, and Pictures folders. This ensures that all your important files are backed up in the cloud and accessible from other devices.
On-Demand Files: Enable Files On-Demand to see all your files stored in OneDrive without downloading them to your PC, saving disk space. Files will only download when you open them.
File Sharing: Share files or folders with colleagues or friends directly from File Explorer. Right-click on the file, choose Share, and generate a shareable link with custom permissions.
With OneDrive, you can access your files anywhere and ensure that important documents are always safe, without having to worry about manual backups.
51. Maximize Efficiency with Focus Sessions
One of the standout productivity features in Windows 11 is Focus Sessions, which integrates with the Clock app to help you maintain focus and minimize distractions.
Set Up Focus Sessions: Open the Clock app and go to the Focus Sessions tab. You can choose the length of your focus period, and Windows will automatically mute notifications during that time, allowing you to work without distractions.
Sync with Microsoft To Do: Focus Sessions syncs with Microsoft To Do, meaning you can directly pull in tasks from your to-do lists and work on them during focus periods. This seamless integration ensures you’re tackling high-priority tasks.
Break Reminders: The feature also schedules breaks, encouraging you to rest and then resume your focus periods. These structured breaks can help prevent burnout and maintain high productivity throughout the day.
Using Focus Sessions is perfect for those who need to manage their time effectively while maintaining focus, ensuring you stay on track without unnecessary distractions.
52. Customize Power Settings for Better Performance or Battery Life
Windows 11 provides detailed power settings that allow you to fine-tune your system’s performance based on your needs, whether you’re seeking optimal battery life or maximum performance.
Choose Power Mode: Go to Settings > System > Power & Battery. Under Power Mode, you can select from Best Performance, Balanced, or Best Power Efficiency. Choose Best Performance for resource-heavy tasks like video editing, or Best Power Efficiency to prolong your battery life.
Battery Saver: Enable Battery Saver when your battery is low or when you’re away from a charger. This feature dims the display and limits background activity to extend your battery life.
Advanced Power Settings: If you need more granular control over your power usage, go to Control Panel > Power Options and select Change plan settings. Here, you can adjust how your system handles sleep, display brightness, and more.
Customizing power settings ensures that your device is optimized for your specific needs, whether you’re looking for more performance or longer battery life, saving you time spent recharging or troubleshooting.
53. Use Voice Typing for Faster Text Input
Windows 11 includes Voice Typing, which allows you to dictate text instead of typing, providing a quick and hands-free way to enter large amounts of text.
Activate Voice Typing: Press Windows + H to open the voice typing tool. You can then dictate into any text field, and Windows will convert your speech into text in real-time.
Punctuation Recognition: Voice Typing also supports basic punctuation commands. For example, you can say “period” or “comma” to insert punctuation, making it easier to dictate complete sentences without manual editing.
Voice Typing in Multiple Languages: Windows 11 supports a wide variety of languages for voice typing. You can switch languages by selecting your desired input language before starting dictation.
Voice typing is a valuable tool for anyone looking to speed up document creation, emails, or other text-heavy tasks, especially when typing might be slow or inconvenient.
54. Manage Open Apps with Taskbar Previews and Jump Lists
The taskbar in Windows 11 allows you to manage open apps more efficiently through previews and Jump Lists.
Taskbar Previews: Hover your mouse over any open app icon in the taskbar to see a small preview of the app. This allows you to quickly see what’s happening in each window without clicking into it.
Jump Lists: Right-click on any taskbar icon to open its Jump List, which shows recently opened files or specific tasks related to the app. For instance, right-clicking on Microsoft Word will display a list of recently opened documents, allowing you to jump straight to your work.
Pin Items to Jump Lists: You can also pin frequently used files or tasks to an app’s Jump List. Right-click on the item in the Jump List and select Pin to this list. This ensures that your most important files or workflows are always just a click away.
By utilizing taskbar previews and Jump Lists, you can navigate between apps and documents much faster, reducing the time spent searching for what you need.
55. Optimize Touchpad Gestures for Faster Navigation
For users on laptops or devices with touchpads, Windows 11 supports a variety of touchpad gestures that make navigation faster and more intuitive.
Customize Touchpad Settings: Go to Settings > Bluetooth & Devices > Touchpad to customize gestures based on your preferences. You can assign different actions to three- or four-finger swipes, such as switching between apps, minimizing windows, or opening the Action Center.
Three-Finger Swipe: Swipe three fingers up on the touchpad to open Task View, making it easier to switch between open apps. Swiping down minimizes all open windows and shows the desktop.
Four-Finger Gestures: If you prefer using four fingers, you can configure these gestures to control media (like play, pause, and volume) or switch between virtual desktops.
Touchpad gestures allow you to navigate Windows 11 quickly and efficiently, reducing the need to move between the keyboard and mouse.
56. Enable Clipboard Sync Across Devices
If you work across multiple devices, Windows 11 allows you to sync your clipboard between them, making it easy to copy and paste content from one device to another.
Enable Clipboard Sync: Go to Settings > System > Clipboard and toggle on Clipboard history and Sync across devices. This allows you to copy text or images on one device and paste them on another.
Access Clipboard History: Press Windows + V to access your clipboard history, which shows a list of recently copied items. From here, you can select the item you want to paste, even if it was copied on a different device.
Clipboard syncing is particularly useful for users who frequently switch between a desktop and a laptop or between work and personal devices, saving time and reducing the hassle of transferring content manually.
57. Speed Up File Transfers with Network Sharing and Nearby Sharing
Windows 11 offers several ways to speed up file transfers between devices on the same network or even between nearby devices using wireless connectivity.
Network Sharing: To quickly transfer files between computers on the same network, set up network sharing by right-clicking a folder, selecting Properties, and then navigating to the Sharing tab. From here, you can share the folder and give access to specific devices or users.
Nearby Sharing: Enable Nearby Sharing by going to Settings > System > Nearby Sharing and toggling it on. This feature allows you to send files wirelessly between devices within Bluetooth or Wi-Fi range, making it perfect for transferring files to nearby laptops or desktops without needing external storage.
Drag and Drop Between Apps: Windows 11 also supports drag-and-drop functionality between apps like File Explorer, Outlook, and OneDrive. You can quickly move files between these apps without going through multiple steps.
Using network and Nearby Sharing helps eliminate the need for USB drives or cloud uploads, speeding up the transfer of files between devices.
58. Take Control of File Versions with OneDrive Version History
OneDrive offers version history, which allows you to view and restore previous versions of files stored in the cloud, ensuring you never lose important data or edits.
Access Version History: To view the version history of a file stored in OneDrive, right-click on the file in File Explorer and select View Version History. You’ll see a list of previous versions, and you can choose to restore an older version if necessary.
Restore Deleted Files: OneDrive also offers a Recycle Bin feature where deleted files are stored for a limited time. You can recover deleted files from the Recycle Bin before they are permanently erased.
Version history and file recovery are invaluable for avoiding data loss and quickly reverting to previous versions of important files without needing to manually back them up.
59. Use Virtualization with Windows Sandbox
Windows Sandbox is a lightweight, virtualized environment in Windows 11 that allows you to run untrusted software or test configurations without affecting your main system.
Enable Windows Sandbox: Go to Control Panel > Programs > Turn Windows features on or off and enable Windows Sandbox. After a restart, you’ll find the Sandbox available in the Start Menu.
Run Isolated Apps: You can launch potentially risky apps or browse suspicious websites in the Sandbox. Since it’s an isolated environment, any changes or malware introduced inside the Sandbox won’t affect your main system.
Delete the Sandbox: Once you close Windows Sandbox, everything inside it is wiped clean. This ensures your main system remains unaffected, and no data is retained.
Windows Sandbox is perfect for testing new software or risky downloads, helping you avoid potential security threats and saving you from needing to reinstall or troubleshoot your system.
60. Sync Settings Across Devices
If you use multiple Windows 11 devices, you can sync your settings across them to ensure a consistent experience, saving time and effort on setup.
Enable Sync Settings: Go to Settings > Accounts > Windows Backup and turn on Remember my preferences. From here, you can choose to sync various settings like passwords, language preferences, and other customizations across all your devices.
Microsoft Account Required: To sync settings, you’ll need to sign in with the same Microsoft account on all devices. Once synced, any changes you make to your settings on one device will automatically apply to others.
Theme and Appearance Syncing: You can also sync personalization settings, such as your wallpaper and theme, ensuring a cohesive experience on all devices.
By syncing your settings, you’ll avoid having to manually reconfigure each device, saving time and providing a seamless experience across all your Windows 11 machines.
61. Organize Open Windows with the New Desktops Feature
In Windows 11, the New Desktops feature allows you to create multiple virtual desktops, each with its own set of open apps and windows, enabling you to keep your workspaces organized.
Create New Desktops: Press Windows + Tab to open Task View, then click New Desktop at the top of the screen. You can create separate desktops for different tasks, such as work, personal projects, or entertainment.
Rename Desktops: You can rename each desktop by right-clicking on it in Task View and selecting Rename. This helps you quickly identify and switch between different desktops based on their purpose.
Customize Desktop Backgrounds: Windows 11 allows you to assign different backgrounds to each desktop, helping you visually distinguish between workspaces.
Virtual desktops are a great way to manage multiple projects or workflows, ensuring you stay organized and productive throughout the day.
62. Increase System Performance with Disk Cleanup and Defragmentation
Over time, your system accumulates junk files and fragmented data that can slow down performance. Regular maintenance using Disk Cleanup and Defragmentation can help keep your system running smoothly.
Run Disk Cleanup: Open Disk Cleanup by typing it into the Start Menu search bar. Select the drive you want to clean, and the tool will analyze and suggest files (like temporary files, system caches, and old updates) that can be safely deleted.
Defragment Your Drives: If you’re using a traditional hard drive (HDD), defragmenting your drive can improve performance by rearranging fragmented data. Open Defragment and Optimize Drives from the Start Menu and schedule regular defragmentation to keep your disk organized.
Storage Sense: Enable Storage Sense in Settings > System > Storage to automatically clean up unused files and optimize disk space on a regular basis.
By regularly cleaning up your system and optimizing your storage, you can ensure that Windows 11 runs at peak performance, reducing the time wasted due to slowdowns or cluttered drives.
63. Use Windows Update to Keep Your System Optimized
Keeping Windows 11 up-to-date is crucial for both performance and security. The Windows Update feature ensures that your system stays optimized with the latest patches, drivers, and feature updates.
Check for Updates: Go to Settings > Windows Update and click Check for updates to manually check for the latest Windows patches and feature releases. You can also schedule updates to install at a convenient time.
Pause Updates: If you’re in the middle of a critical task, you can pause updates for up to 35 days. This ensures that updates don’t interrupt your workflow by restarting your computer unexpectedly.
Optional Updates: Check Optional Updates for new driver updates or feature packs that might improve system performance or hardware compatibility.
By regularly updating your system, you ensure that Windows 11 runs smoothly with the latest security and performance improvements.
64. Streamline Your Workspace with Microsoft Teams Integration
Windows 11 comes with built-in Microsoft Teams integration, allowing you to quickly connect with colleagues, friends, or family members for chats, video calls, and meetings.
Launch Teams from the Taskbar: Click the Teams icon on the taskbar to instantly launch the app. You can start a chat or call directly from here without needing to open the full app.
Integrate with Outlook and Calendar: Teams integrates seamlessly with Outlook and your calendar, making it easy to schedule meetings or share availability with colleagues in just a few clicks.
Meet Now: Use the Meet Now feature in Teams to start impromptu meetings with a simple click. You can send invites to others even if they don’t have Teams installed.
Teams integration simplifies communication and collaboration, ensuring that you spend less time switching between apps and more time focusing on productive work.
65. Keep Your PC Clean with Regular Malware Scans
Windows Security is built into Windows 11, providing real-time protection against malware, viruses, and other threats. Regular scans help keep your PC running smoothly and securely.
Run Quick and Full Scans: Go to Settings > Privacy & Security > Windows Security > Virus & Threat Protection. From here, you can run a quick scan or a full system scan to detect and remove any malware.
Enable Real-Time Protection: Windows Security offers real-time protection, which constantly monitors your system for suspicious activity. Ensure that this feature is turned on to catch potential threats as they occur.
Schedule Automatic Scans: Set up automatic scans on a weekly or daily basis to keep your system protected without manually initiating each scan.
Regular malware scans ensure that your system stays secure, preventing disruptions caused by security threats and minimizing potential data loss.
66. Use Dictation for Hands-Free Typing
Windows 11 has a built-in dictation feature that allows you to input text simply by speaking, which can be a great time-saver for tasks like writing emails, documents, or notes.
Activate Dictation: Press Windows + H to open the dictation tool. Once activated, you can speak into your microphone, and Windows will convert your voice into text in any text field.
Voice Commands: You can also use voice commands such as “new line,” “delete,” or “select all” to control your text hands-free.
Punctuation Control: Windows 11’s dictation feature can recognize simple punctuation commands like “comma” or “period,” making your spoken words flow more naturally into typed sentences.
This feature is especially useful for users who need to write large amounts of text quickly or for those who want a break from typing.
67. Manage Memory Usage with Virtual Memory Adjustments
Virtual memory in Windows 11 allows your computer to use hard drive space as RAM when physical memory runs low. Adjusting virtual memory settings can help prevent slowdowns, especially when running resource-intensive applications.
Adjust Virtual Memory: Go to Settings > System > About, then click Advanced system settings. Under the Performance section, click Settings, then navigate to the Advanced tab and click Change under virtual memory.
Optimize for Performance: Set a custom size for your virtual memory based on your system’s needs, usually 1.5 to 2 times the amount of installed physical RAM.
Automatic Management: You can also let Windows 11 manage your virtual memory settings by enabling the Automatically manage paging file size for all drives option.
Tweaking virtual memory ensures your system doesn’t experience slowdowns when running memory-heavy tasks, improving overall performance and efficiency.
68. Supercharge Task Management with PowerToys’ FancyZones
Microsoft’s PowerToys tool includes FancyZones, a utility designed to supercharge your multitasking by letting you create custom window layouts.
Install PowerToys: Download and install PowerToys from the official Microsoft GitHub page. Once installed, open the PowerToys settings and navigate to FancyZones.
Create Custom Layouts: Use FancyZones to create custom window layouts on your desktop. You can divide your screen into as many zones as you like, allowing you to arrange multiple windows in a specific pattern.
Save and Reuse Layouts: Once your layout is set, you can quickly snap windows into these predefined zones by holding the Shift key while dragging windows. FancyZones remembers your setup, making it easy to return to your favourite layouts.
FancyZones is ideal for users who work with multiple apps and Windows at once, as it helps keep your desktop organized and improves workflow efficiency.
69. Use Advanced Clipboard Features in Windows 11
The clipboard in Windows 11 goes beyond simple copy-paste functionality. You can use Clipboard History and Cloud Clipboard to access multiple copied items across your devices.
Access Clipboard History: Press Windows + V to view your clipboard history, which stores everything you’ve copied during your current session. From here, you can paste previously copied items, even if they’ve been overwritten.Pin Important Clipboard Items: Pin frequently used items in the clipboard history so they remain available, even after rebooting your system.
Sync Clipboard Across Devices: Enable Cloud Clipboard in Settings > System > Clipboard to sync clipboard data across all your devices signed in with the same Microsoft account. This lets you copy something on one device and paste it on another.
The advanced clipboard features in Windows 11 can save a lot of time for users who need to copy and paste multiple items during their workflow.
70. Organize Your Start Menu for Quick Access
Customizing the Start Menu in Windows 11 can help you quickly access your most-used apps, files, and settings, reducing the time spent searching through folders or menus.
Pin Apps to Start Menu: Right-click on any app and select Pin to Start to place frequently used apps in the Start Menu for easy access.
Create App Groups: You can group pinned apps into sections by dragging them together. For example, you could create a “Work” group with your productivity apps and a “Leisure” group with entertainment apps.
Unpin Unnecessary Apps: To declutter the Start Menu, unpin apps you rarely use by right-clicking them and selecting Unpin from Start.
Organizing the Start Menu with your most essential apps ensures you spend less time searching and more time being productive.
71. Use Taskbar Auto-Hide for More Screen Space
Windows 11 allows you to auto-hide the taskbar, giving you more screen space for your work and reducing distractions.
Enable Auto-Hide: Right-click on the taskbar and select Taskbar settings. In the settings window, turn on Automatically Hide the taskbar in desktop mode. The taskbar will now disappear when not in use and reappear when you hover your mouse over the bottom of the screen.
Auto-Hide in Tablet Mode: You can also enable auto-hide for the taskbar when using a touch-enabled device in tablet mode, maximizing screen space for touch interactions.
This setting is perfect for users who need more screen real estate, such as those working on smaller laptops or tablets.
72. Speed Up File Access with the Quick Access Toolbar in File Explorer
Windows 11’s Quick Access Toolbar in File Explorer allows you to pin frequently used commands for easier and faster file management.
Enable Quick Access Toolbar: Open File Explorer, click on the three dots in the top-right corner, and select Options. In the General tab, ensure that the Show Quick Access Toolbar is enabled.
Pin Common Tasks: Add common tasks such as Copy, Paste, or Delete to the Quick Access Toolbar for one-click access.
Pin Folders to Quick Access: You can also pin frequently accessed folders to the Quick Access section in File Explorer, giving you instant access to your most-used directories.
Using the Quick Access Toolbar ensures that your most important file management tasks are just a click away, saving time and improving efficiency.
73. Maximize Productivity with Windows Key Shortcuts
Learning and using Windows Key shortcuts is a surefire way to save time and boost productivity in Windows 11.
Windows + D: Show or hide the desktop, minimizing all open windows.
Windows + E: Open File Explorer instantly.
Windows + I: Open the Settings app.
Windows + L: Lock your computer quickly when you step away.
Windows + X: Open the Power User menu for quick access to key system features like Device Manager and Disk Management.
Windows + Number Key: Open taskbar apps by pressing the corresponding number key. For example, Windows + 1 opens the first app pinned to the taskbar, Windows + 2 opens the second app, and so on.
Memorizing and using these shortcuts will streamline your interaction with Windows 11, reducing the need for mouse clicks and speeding up common tasks.
74. Customize Notifications to Stay Focused
Windows 11’s Focus Assist and Notification Settings help you manage and filter notifications so you only see important alerts during your workday.
Enable Focus Assist: Go to Settings > System > Focus Assist and choose the level of filtering you want. You can allow only priority notifications (like emails or calendar events) or silence all notifications during work hours.
Priority List: Customize the Priority List to include apps and contacts that are allowed to send notifications while Focus Assist is on.
Automatic Rules: Set up Automatic Rules to turn on Focus Assist during specific times of the day or when using certain apps (like games or presentations).
Managing notifications effectively ensures that you stay focused on your tasks without being distracted by unnecessary alerts, enhancing your productivity.
75. Boost System Responsiveness with Fast Startup
Fast Startup in Windows 11 can speed up boot times by saving your system state to a file upon shutdown and loading it faster when you power it on.
Enable Fast Startup: Open Control Panel > Power Options > Choose what the power buttons do. Scroll down to Shutdown settings and enable Turn on fast startup.
Benefits: This feature combines the benefits of a cold boot and hibernation, allowing your computer to start faster by loading essential data from your hard drive rather than initializing everything from scratch.
Enabling Fast Startup can shave seconds off your boot time, ensuring your system is ready to go when you need it.
76. Use Nearby Sharing for Fast File Transfer Between Devices
Windows 11’s Nearby Sharing feature allows you to quickly transfer files between nearby devices without needing a USB drive or internet connection.
Enable Nearby Sharing: Go to Settings > System > Nearby Sharing and turn it on. Choose whether to share files with everyone nearby or just devices linked to your Microsoft account.
Share Files Easily: Right-click on the file you want to share, select Share, and choose the nearby device to send it to.
Clipboard Sharing: You can also share clipboard content (such as text or links) between devices using Nearby Sharing, saving time when moving content from one device to another.
This feature is perfect for quickly transferring files between computers, reducing the need for external storage or email attachments.
77. Organize Apps with Virtual Desktops
Windows 11’s Virtual Desktops feature allows you to create and manage multiple desktops for different tasks, helping you keep your workspace organized and clutter-free.
Create a New Desktop: Press Windows + Tab to open Task View, then click New Desktop at the top. You can have separate desktops for different projects or workflows.
Switch Between Desktops: Easily switch between desktops by pressing Windows + Ctrl + Left/Right Arrow.
Move Windows Between Desktops: You can move windows between desktops by dragging them in Task View or by right-clicking the window in Task View and selecting Move to another desktop.
Virtual Desktops are great for managing different workspaces, allowing you to focus on specific tasks without getting overwhelmed by too many open apps.
78. Use PowerToys Keyboard Manager for Custom Shortcuts
PowerToys Keyboard Manager allows you to remap keys and create custom keyboard shortcuts, helping you streamline your workflow in Windows 11.
Install PowerToys: Download and install PowerToys from Microsoft’s GitHub page. Open the settings and navigate to Keyboard Manager.
Remap Keys: Use the Remap a key option to change the function of specific keys. For example, you could remap the Caps Lock key to act as Ctrl if you frequently use keyboard shortcuts.
Create Custom Shortcuts: You can also create new shortcuts by remapping key combinations, like assigning Ctrl + Shift + P to open a specific app or perform a system function.
Customizing your keyboard layout with PowerToys can significantly reduce the time spent on repetitive tasks and make your workflow more efficient.
79. Speed Up Search with Advanced Indexing Options
Windows 11’s Search feature can be optimized using Indexing Options to make finding files and apps faster and more accurate.
Open Indexing Options: Type Indexing Options in the Start Menu and open it. From here, you can choose which folders or drives to index for faster search results.
Customize Indexed Locations: If you frequently search specific folders or drives, add them to the index. You can also remove rarely used locations from the index to speed up searches.
Rebuild the Index: If you notice that search results are slow or inaccurate, click Advanced and select Rebuild to reset the index.
Optimizing your indexing ensures that search results are returned more quickly, especially if you have a large number of files or directories to sift through.
80. Use Quick Settings for Faster Access to Common Functions
Windows 11 features a Quick Settings panel that lets you easily toggle commonly used system settings without navigating through the Control Panel.
Open Quick Settings: Click the battery, Wi-Fi, or volume icon in the taskbar (or press Windows + A) to open the Quick Settings panel.
Customize Quick Settings: Click the pencil icon in the bottom-right corner of the panel to add or remove settings. You can include options like Night Light, Airplane Mode, and Project for easy access.
Adjust System Controls: Quick Settings also allows you to adjust screen brightness, volume, and connect to Bluetooth or Wi-Fi devices quickly.
Customizing the Quick Settings panel ensures that you can access frequently used system functions instantly, saving time and reducing the need for more complex navigation.
81. Use Snap Groups for Better Multitasking
Windows 11 introduces Snap Groups, a feature that remembers your window layouts, allowing you to quickly restore sets of apps when multitasking.
Snap Windows Together: Hover over the maximize button on any window to see available Snap Layouts. Choose a layout, and Windows will automatically organize your open windows.
Switch Between Snap Groups: Once you’ve arranged apps into a Snap Group, hover over one of the apps in the taskbar to see the Snap Group. Clicking on the Snap Group icon restores all the windows in that group in their original layout.
Use Snap Layouts Across Multiple Monitors: If you use multiple monitors, Snap Groups work across them, making it easy to maintain an organized layout even when working with several screens.
Snap Groups help you save time by keeping your windows organized and allowing you to switch between tasks without needing to manually arrange them again.
82. Maximize Your Workflow with Windows Terminal
Windows 11 comes with the Windows Terminal, a versatile and powerful tool that brings together Command Prompt, PowerShell, and Azure Cloud Shell in a single interface.
Launch Windows Terminal: Right-click the Start Menu button and select Windows Terminal or press Windows + X followed by Windows Terminal.
Use Multiple Tabs: Windows Terminal allows you to open multiple tabs, so you can have different command-line environments (like Command Prompt and PowerShell) running side by side.
Custom Profiles and Themes: Customize your terminal with different profiles, colors, and themes to fit your preferences. Open Settings within Windows Terminal to configure these options.
Using Windows Terminal allows developers, system admins, and power users to manage their tasks more efficiently, offering a unified experience for all your command-line needs.
83. Set Default Apps for Faster File Handling
Configuring default apps in Windows 11 ensures that files open in your preferred application automatically, reducing the time spent manually selecting apps each time.
Change Default Apps: Go to Settings > Apps > Default apps. Here, you can set default apps for various file types (such as PDFs, images, and videos) or protocols (like web browsing, email, etc.).
Set App Defaults by File Type: If you have specific preferences for certain file types, scroll down to Choose default apps by file type and assign your desired application for each extension.
Custom Protocol Settings: For web links or specific actions (like opening emails or maps), you can set default protocols, ensuring that the correct apps always handle these tasks.
By setting default apps, you’ll reduce the time spent manually opening files or adjusting settings each time, streamlining your file management process.
84. Automate Repetitive Tasks with Task Scheduler
The Task Scheduler in Windows 11 allows you to automate various tasks, reducing manual effort and ensuring that important processes run at the right time.
Create New Tasks: Open Task Scheduler by typing it into the Start Menu. Click Create Basic Task and follow the wizard to set up a new task. You can schedule tasks like backing up files, running scripts, or launching apps at specific times.
Set Task Triggers: You can define triggers, such as starting tasks at login, at a specific time, or when a certain event occurs. For example, you could set Task Scheduler to clean temporary files every week automatically.
Monitor Task Performance: Task Scheduler logs all the tasks it runs, allowing you to monitor whether they are executed successfully. Check the Task Scheduler Library for a history of executed tasks.
Task automation with Task Scheduler is a great way to save time on repetitive tasks and ensure that essential processes run without manual intervention.
85. Use File History to Back Up Important Files
Windows 11’s File History feature ensures that your important files are backed up regularly, allowing you to restore previous versions if needed.
Enable File History: Go to Settings > Update & Security > Backup and turn on Automatically back up my files. Choose an external drive or network location to store your backups.
Select Folders to Back Up: File History automatically backs up important folders like Documents, Pictures, and Desktop. You can add or remove folders by selecting More options in the Backup settings.
Restore Previous Versions: If you accidentally delete or overwrite a file, you can use File History to restore it. Right-click the file or folder in File Explorer, select Properties, and go to the Previous Versions tab to restore an earlier version.
With File History, you ensure that your critical data is always backed up, reducing the risk of data loss and saving time when recovering important files.
86. Clean Up Your System with Storage Sense
Windows 11’s Storage Sense feature helps you automatically free up disk space by removing unnecessary files, including temporary files, recycle bin contents, and old downloads.
Turn on Storage Sense: Go to Settings > System > Storage and enable Storage Sense. This will allow Windows to automatically delete temporary files and other unnecessary data.
Customize Cleanup Settings: Under Configure Storage Sense or run it now, you can adjust when Storage Sense runs (for example, when disk space is low, or on a regular schedule) and specify how long files stay in the Recycle Bin or Downloads folder before being deleted.
Run Manually: You can also run Storage Sense on-demand by clicking Run Storage Sense now to perform an immediate cleanup.
Storage Sense helps keep your system running smoothly without the need for manual maintenance, ensuring you always have enough storage space for your important files.
87. Use the Xbox Game Bar for Screen Recording and Monitoring
While primarily designed for gaming, the Xbox Game Bar is also a useful tool for general screen recording and system performance monitoring.
Open Xbox Game Bar: Press Windows + G to open the Xbox Game Bar overlay. From here, you can access tools like screen recording, performance monitoring, and audio controls.
Record Your Screen: Use the Capture tool to record your screen or take screenshots. This is especially useful for creating tutorials or troubleshooting steps without needing third-party software.
Monitor Performance: The Performance tab shows real-time statistics for CPU, GPU, RAM, and disk usage, allowing you to track system performance while running applications.
The Xbox Game Bar is a versatile tool for non-gamers too, providing quick access to screen recording and system performance insights.
88. Optimize System Performance with Resource Monitor
Resource Monitor in Windows 11 provides in-depth information about how your system resources—such as CPU, memory, disk, and network—are being used.
Access Resource Monitor: Open Task Manager (press Ctrl + Shift + Esc) and go to the Performance tab. From there, click Open Resource Monitor to get a detailed view of resource usage.
Identify Resource Hogs: Resource Monitor shows which processes are using the most CPU, memory, or disk space. You can end these processes to free up resources and improve system performance.
Monitor Disk and Network Activity: You can also see which apps or processes are accessing your disk or network, allowing you to troubleshoot any performance bottlenecks.
Using Resource Monitor helps you identify and address resource-intensive apps, improving overall system performance and efficiency.
89. Manage Background Apps for Better Performance
Background apps in Windows 11 can consume system resources, leading to slower performance. Managing these apps helps improve system responsiveness.
Limit Background Apps: Go to Settings > Apps > Apps & Features and select an app you want to manage. Click Advanced options and choose whether the app can run in the background.
Disable Unnecessary Background Apps: You can disable background activity for apps you don’t frequently use. This prevents them from using CPU, memory, and battery resources unnecessarily.
Background App Permissions: Some apps, like email or messaging apps, need to run in the background for real-time notifications. Ensure that only essential apps have these permissions to optimize performance.
Managing background apps helps free up system resources, making your computer run faster and more efficiently.
90. Use Windows 11 Dynamic Lock for Automatic Security
Dynamic Lock automatically locks your Windows 11 computer when you walk away by detecting your paired Bluetooth device (such as a smartphone or wearable) moving out of range.
Enable Dynamic Lock: Go to Settings > Accounts > Sign-in options and scroll down to Dynamic Lock. Check the box to allow Windows to lock your device when it detects that your Bluetooth device is out of range.
Pair a Bluetooth Device: Ensure that your smartphone or other Bluetooth-enabled device is paired with your Windows 11 computer. When you move away from your computer, it will automatically lock, keeping your information secure.
Unlock Manually: When you return, you’ll need to manually unlock your computer with your password, PIN, or Windows Hello.
Dynamic Lock is a useful security feature for users in shared or public spaces, ensuring that your computer locks itself when you’re not nearby, without needing manual input.
91. Optimize Battery Life on Laptops with Power Settings
For laptop users, managing power settings in Windows 11 can help maximize battery life without compromising performance.
Enable Battery Saver: Go to Settings > System > Power & Battery and turn on Battery Saver. This mode reduces background activity and limits performance to extend battery life.
Optimize Power Mode: Under Power Mode, you can choose between Best Power Efficiency, Balanced, and Best Performance. Choose Best Power Efficiency when you’re away from a charger to extend your battery life.
Adjust Screen Brightness: Lowering your screen brightness can significantly extend your battery life. You can adjust brightness from the Quick Settings panel (press Windows + A).
Optimizing these power settings ensures that your laptop lasts longer on a single charge, which is especially useful when working on the go.
92. Organize Your Workflow with Focus Assist
Focus Assist in Windows 11 helps you stay focused by blocking distracting notifications during specific times or activities.
Turn On Focus Assist: Go to Settings > System > Focus Assist and choose whether to allow only priority notifications or to block all notifications during work hours.
Automatic Rules: Set up automatic rules to turn on Focus Assist during specific times of the day, during presentations, or while playing games. You can customize these rules to suit your schedule.
Review Notifications Later: When Focus Assist is turned off, you can review the notifications you missed by checking the Action Center (press Windows + N).
By using Focus Assist, you can reduce distractions and maintain productivity during critical work periods.
93. Use Night Light to Reduce Eye Strain
Windows 11 includes a Night Light feature that reduces blue light emitted from your screen, which can help reduce eye strain and make it easier to wind down at the end of the day.
Turn on Night Light: Go to Settings > System > Display and toggle on Night Light. You can adjust the intensity of the blue light reduction based on your preferences.
Schedule Night Light: Set a schedule to turn the Night Light on automatically at sunset and off at sunrise, or specify custom times.
Manually Adjust: If needed, you can turn the Night Light on or off manually from the Quick Settings panel (press Windows + A).
Night Light is especially useful for users who work late into the evening, as it helps minimize the strain on your eyes caused by prolonged screen exposure.
94. Speed Up File Navigation with Keyboard Shortcuts in File Explorer
Using keyboard shortcuts in File Explorer can greatly speed up file navigation and management, making it easier to handle tasks without relying on the mouse.
Alt + Up Arrow: Go up one folder level in the directory.
Ctrl + N: Open a new File Explorer window.
F2: Rename the selected file or folder.
Ctrl + Shift + N: Create a new folder.
Ctrl + E or Ctrl + F: Focus on the search box in File Explorer to quickly find files.
Mastering these shortcuts allows you to navigate and manage files in File Explorer faster and more efficiently, saving time during file organization tasks.
95. Use Windows Hello for Fast and Secure Sign-In
Windows Hello provides a fast, secure, and password-free way to sign in to your Windows 11 device using facial recognition, a fingerprint, or a PIN.
Set Up Windows Hello: Go to Settings > Accounts > Sign-in options and configure Windows Hello using facial recognition, fingerprint, or PIN, depending on your hardware.
Faster Sign-In: Windows Hello provides instant sign-in when you approach your device, eliminating the need to type passwords and enhancing security.
Secure Your Apps: You can also use Windows Hello to sign into supported apps and websites, adding another layer of security while speeding up your workflow.
Using Windows Hello not only saves time when logging into your device but also enhances security, making it a valuable feature for both personal and professional use.
Windows 11 is a powerful, versatile operating system designed to enhance productivity and efficiency for users of all levels. By leveraging the built-in features and tools—from Snap Layouts to PowerToys and Focus Assist—users can optimize their workflows and save valuable time on both routine and complex tasks. Mastering keyboard shortcuts, customizing the Start Menu and Taskbar, utilizing advanced file management tools, and automating processes with Task Scheduler or Power Automate can transform how you interact with your PC.
Whether you’re a casual user looking to streamline your daily interactions or a professional aiming to enhance multitasking and performance, the 95 time-saving tips outlined here provide practical ways to unlock Windows 11’s full potential. From managing your apps with Snap Groups and Virtual Desktops to securing your device with Windows Hello and Dynamic Lock, these strategies will not only help you save time but also make your computing experience more enjoyable and productive.

