Why People Unsubscribe from Kindle Unlimited
We all have our reasons for making changes to our digital lives. Maybe you’ve devoured all the titles you’ve wanted to read on Kindle Unlimited, or perhaps your reading habits have changed. Whatever your reason, this guide will walk you through the exact steps for canceling your Kindle Unlimited subscription, whether you’re using a desktop or mobile device.
Note: Cancelling your subscription means you can read your paid books until the end of the current billing cycle. After that, those books will be removed from your library.
The Desktop Way: Canceling on Windows, Mac, Linux, or Chromebook
Starting the Process
First things first: navigate to the Amazon website using a web browser on your desktop. You’ll need to be signed in to your Amazon account for this.
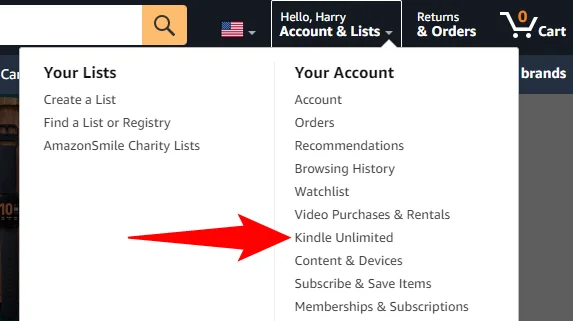
“In Amazon’s top-right corner, hover your cursor over the ‘Account & Lists’ menu. This will open a submenu.”
Accessing Kindle Unlimited
“In the submenu that opens, click ‘Kindle Unlimited.'”
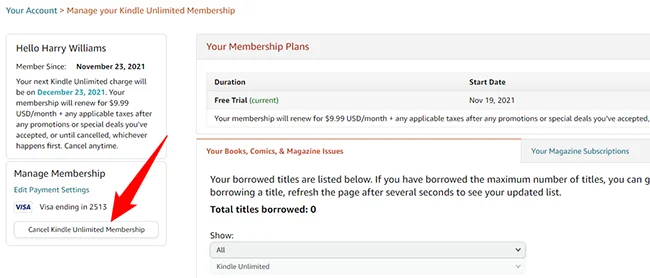
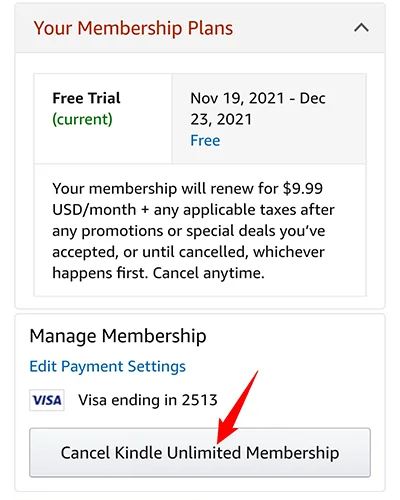
You’ll find yourself on a page displaying the nitty-gritty details of your subscription.
Clicking the Cancel Button
“Here, in the left sidebar, click ‘Cancel Kindle Unlimited Membership.'”
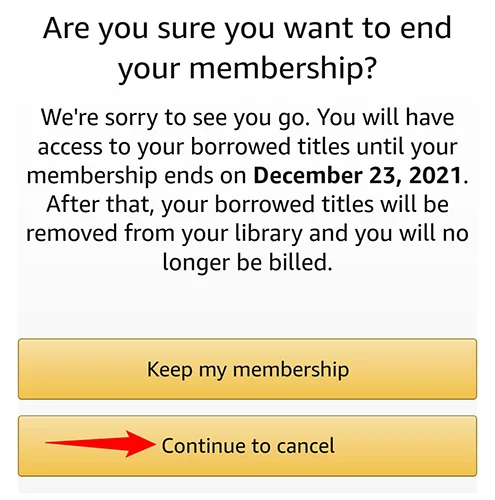
Don’t be surprised if Amazon tries to win you back. You’ll see a prompt asking if you’re sure you want to cancel.
“To continue, click the ‘Continue to Cancel’ button.”
If you have a change of heart, there’s a “Keep My Membership” button as well.
Final Confirmation
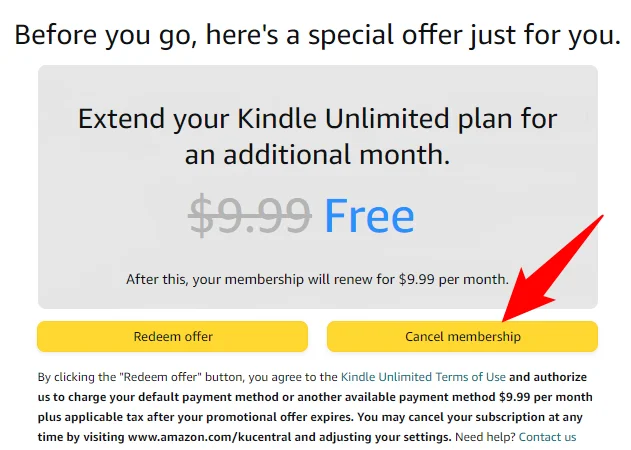
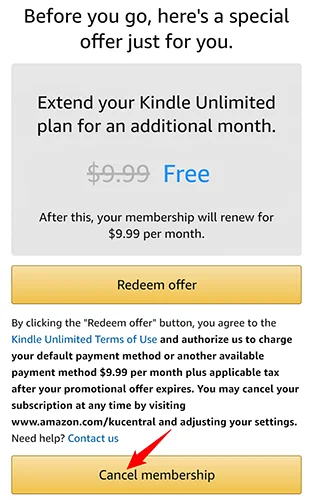
“Amazon might offer you an incentive to keep your membership. To continue with cancellation, click the ‘Cancel Membership’ button.”
That’s it! You are officially out of the Kindle Unlimited loop.
The Mobile Route: iPhone, iPad, and Android Unsubscribing
Initial Steps
If you prefer the small screen, launch the Amazon app on your phone and sign in.
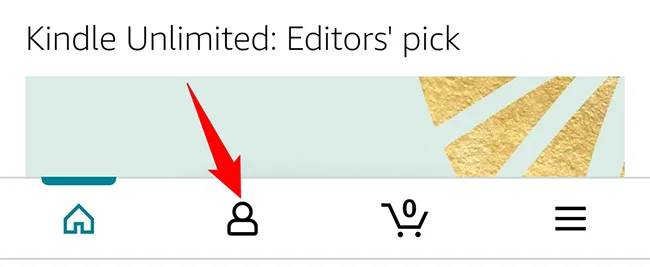
“At the bottom bar of the app, tap the user icon.”
Navigating to Account Settings
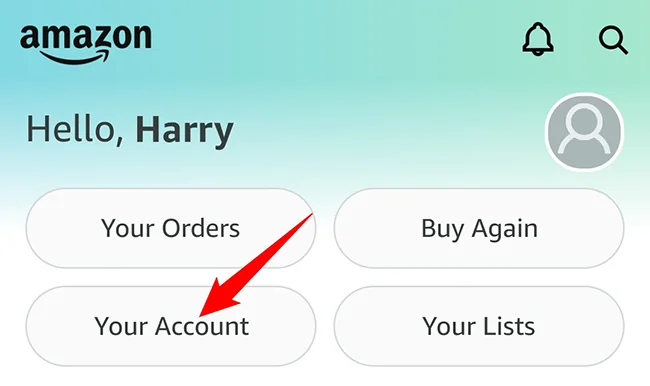
“On the user page that opens, tap ‘Your Account’ to view your account settings.”
It’s time to scroll. Head down to the “Account Settings” section.
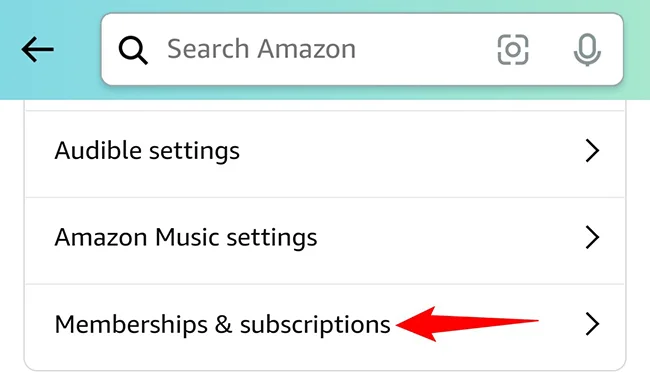
“Here, at the bottom, tap ‘Memberships & Subscriptions.'”
Taking the Final Steps
Locate your Kindle Unlimited subscription and prepare to say goodbye.
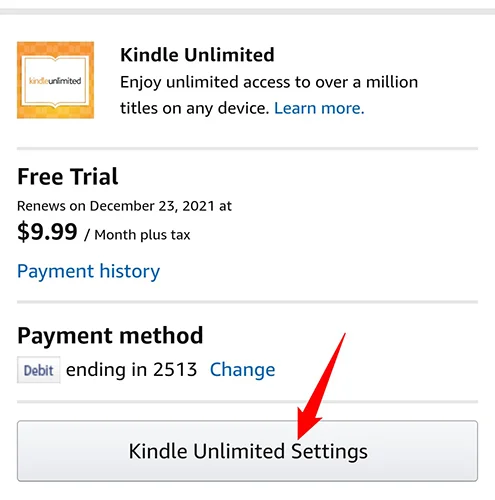
“Find the Kindle Unlimited subscription, and beneath it, tap ‘Kindle Unlimited Settings.'”
Just like on desktop, you’ll have to confirm your choice.
“Scroll down this page and tap ‘Cancel Kindle Unlimited Membership.'”
And as a last step, Amazon will double-check your decision.
“Amazon will ask if you really want to cancel your subscription. Tap ‘Continue to Cancel.'”
You might see a last-minute offer, but if you’re determined, press on.
“To proceed with cancellation, tap ‘Cancel Membership.'”
And voila, you are Kindle Unlimited-free!
What About Amazon Music Unlimited?
If you’re in the mood for even more digital spring cleaning, remember that canceling your Amazon Music Unlimited subscription is also an option, and it’s just as straightforward.
Savor your books until your current billing cycle comes to an end. Safe travels on your next digital adventure!

